It’s Red Hat Summit week, and we wanted to use this as an opportunity to highlight several aspects of the Docker and Red Hat partnership. In this post, we highlight Docker Desktop and Red Hat OpenShift. In another post, we talk about 160% year-over-year growth in pulls of Red Hat’s Universal Base Image on Docker Hub.
Why Docker Desktop + Red Hat OpenShift?
Docker Desktop + Red Hat OpenShift allows the thousands of enterprises that depend on Red Hat OpenShift to leverage the Docker Desktop platform that more than 20 million active developers already know and trust to eliminate daily friction and empower them to deliver results.

What problem it solves
Sometimes, it feels like coding is easy compared to the sprint demo and getting everybody’s approval to move forward. Docker Desktop does the yak shaving to make developing, using, and testing containerized applications on Mac and Windows local environments easy, and the Red Hat OpenShift extension for Docker Desktop extends that with one-click pushes to Red Hat’s cloud container platform.
One especially convenient use of the Red Hat OpenShift extension for Docker Desktop is for quickly previewing or sharing work, where the ease of access and friction-free deploys without waiting for CI can reduce cycle times early in the dev process and enable rapid iteration leading up to full CI and production deployment.
Getting started
If you don’t already have Docker Desktop installed, refer to our guide on Getting Started with Docker.
Installing the extension
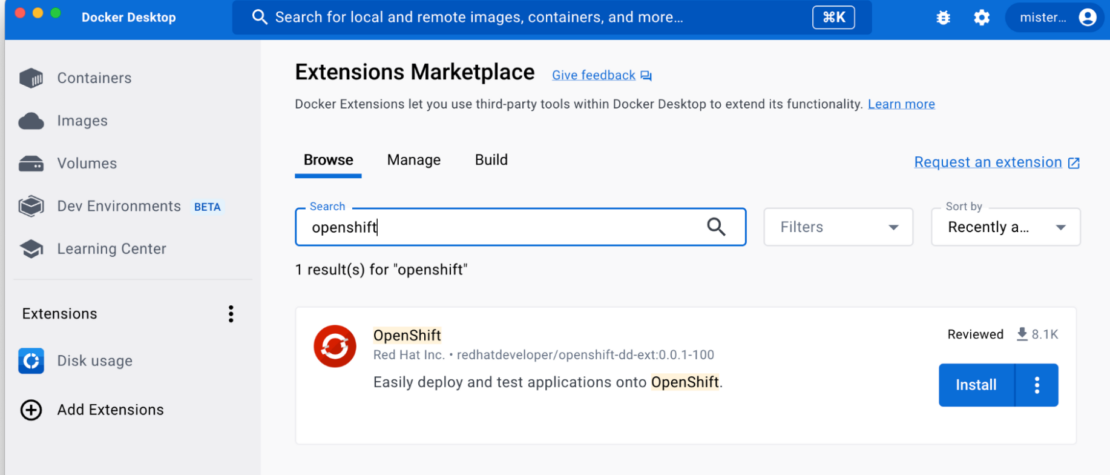
The Red Hat OpenShift extension is one of many in the Docker Extensions Marketplace. Select Install to install the extension.
👋 Pro tip: Have an idea for an extension that isn’t in the marketplace? Build your own and let us know about it! Or don’t tell us about it and keep it for internal use only — private plugins for company or team-specific workflows are also a thing.
Signing into the OpenShift cluster in the extension
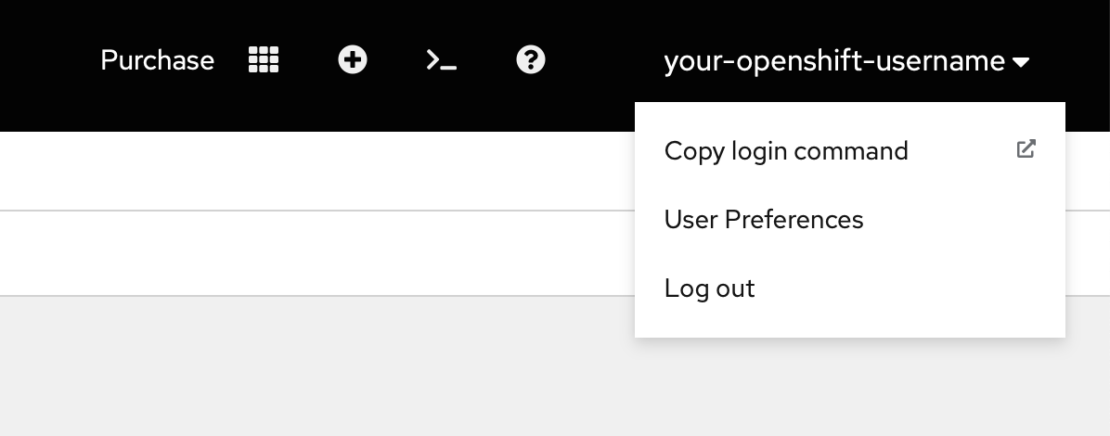
From within your Red Hat OpenShift cluster web console, select the copy login command from the user menu:
👋 Don’t have an OpenShift cluster? Red Hat supports OpenShift exploration and development with a developer sandbox program that offers immediate access to a cluster, guided tutorials, and more. To sign up, go to their Developer Sandbox portal.
That leads to a page with the details you can use to fetch the Kubernetes context you can use in the Red Hat OpenShift extension and elsewhere:

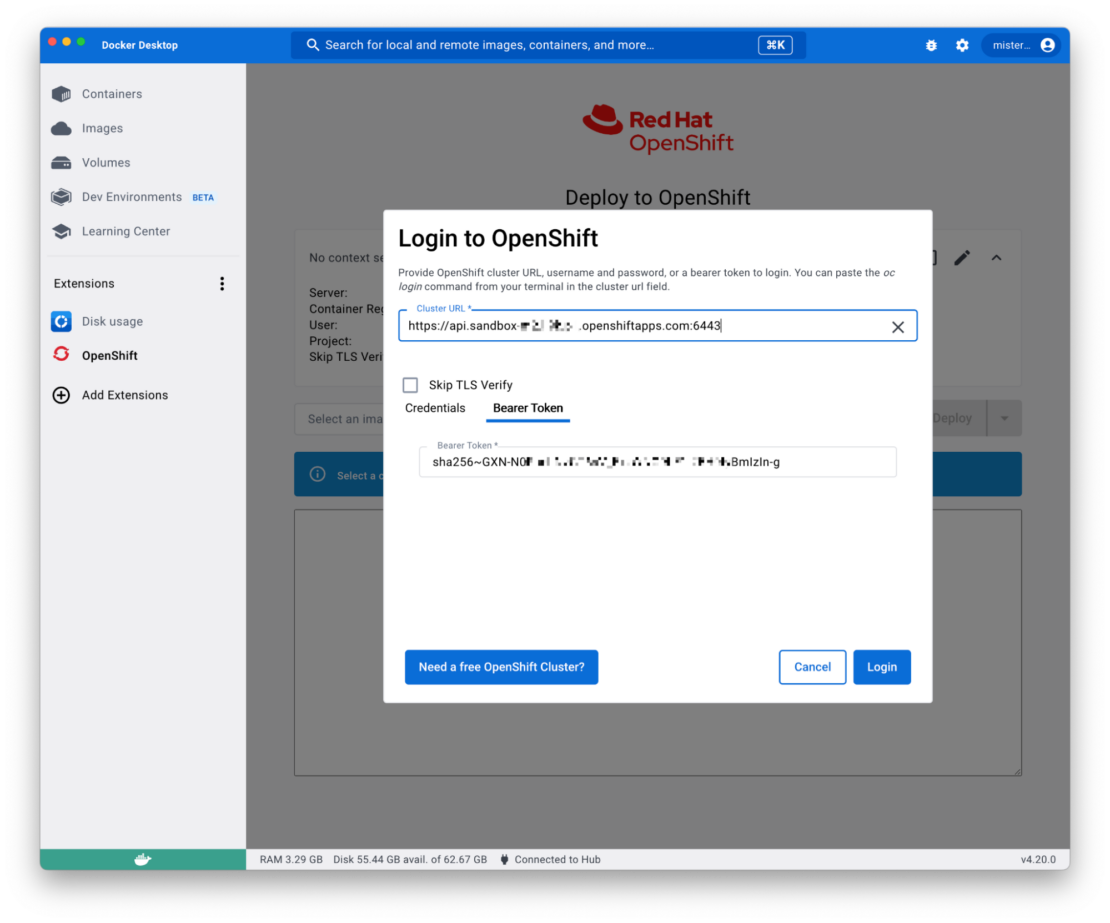
From there, you can come back to the Red Hat OpenShift extension in Docker Desktop. In the Deploy to OpenShift screen, you can change or log in to a Kubernetes context. In the login screen, paste the whole oc login line, including the token and server URL from the previous:
Your first deploy
Using the extension is even easier than installing it; you just need a containerized app. A sample racing-game-app is ready to go with a Dockerfile (docs) and OpenShift manifest (docs), and it’s a joy to play.
To get started, clone https://github.com/container-demo/HexGL.
👋 Pro tip: Have an app you want to containerize? Docker’s newly introduced docker init command automates the creation of Dockerfiles, Compose manifests, and .dockerignore files.
Build your image
Using your local clone of sample racing-game-app, cd into the repo on your command line, where we’ll build the image:
1 | docker build --platform linux/amd64 -t sample-racing-game . |
The --platform linux/amd64 flag forces x86 compatible image, even if you’re building from a Mac with Apple Silicon/ARM CPU. The -t sample-racing-game names and tags your image with something more recognizable than a SHA256. Finally, the trailing dot (“.”) tells Docker to build from the current directory.
Starting with Docker version 23, docker build leverages BuildKit with more performance, better caching, and support for things like build secrets that make our lives as developers easier and more secure.
Test the image locally
Now that you’ve built your image, you can test it out locally. Just run the image using:
1 | docker run -d -p 8080:8080 sample-racing-game |
And open your browser to http://localhost:8080/ to take a look at the result.
Deploy to OpenShift
With the image built, it’s time to test it out on the cluster. We don’t even have to push it to a registry first.
Visit the Red Hat OpenShift extension in Docker Desktop, select our new sample-racing-game image, and select Push to OpenShift and Deploy from the action button pulldown:
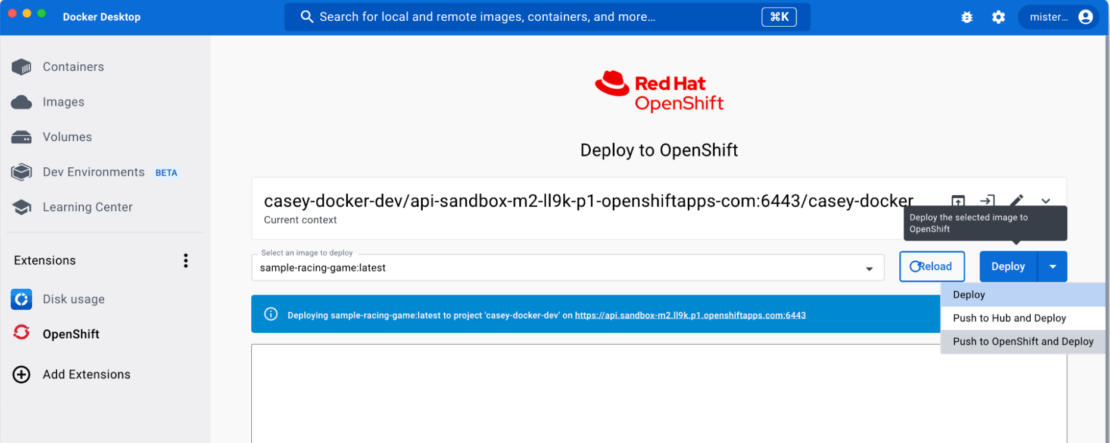
The Push to OpenShift and Deploy action will push the image to the OpenShift cluster’s internal private registry without any need to push to another registry first. It’s not a substitute for a private registry, but it’s convenient for iterative development where you don’t plan on keeping the iterative builds.
Once you click the button, the extension will do exactly as you intend and keep you updated about progress:
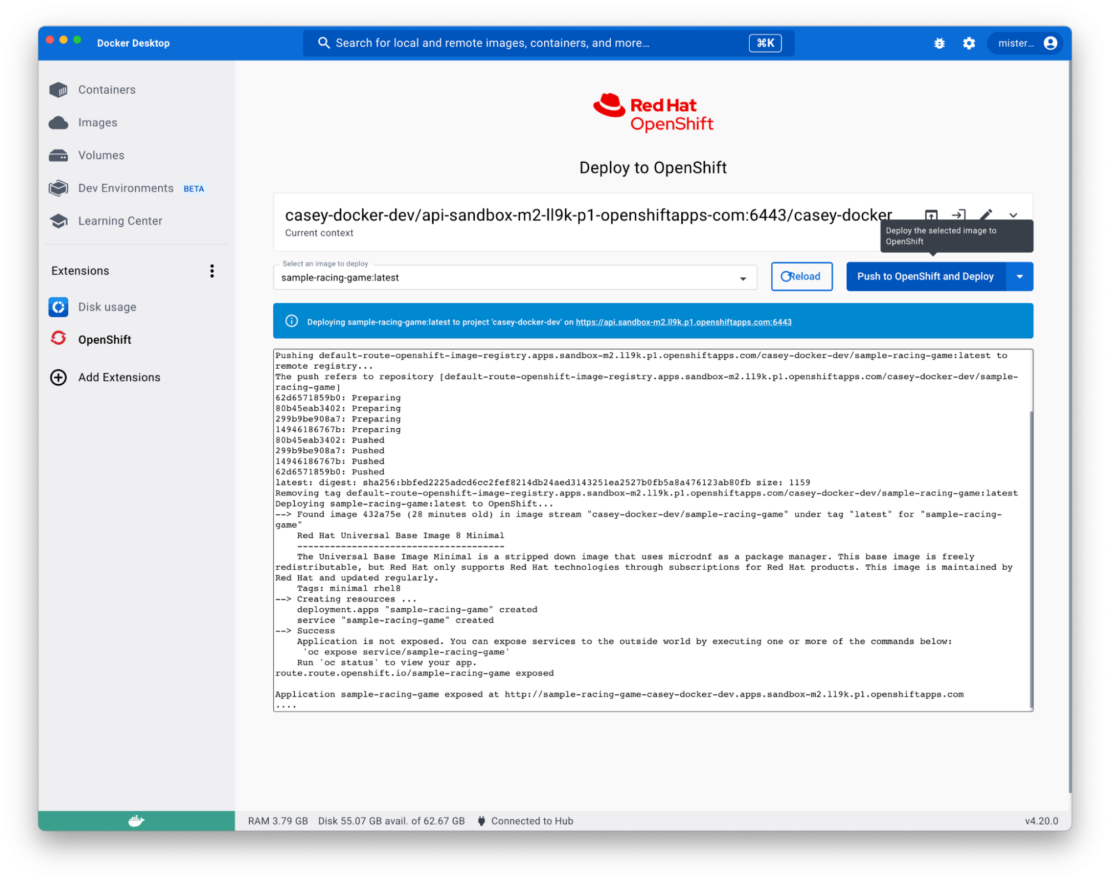
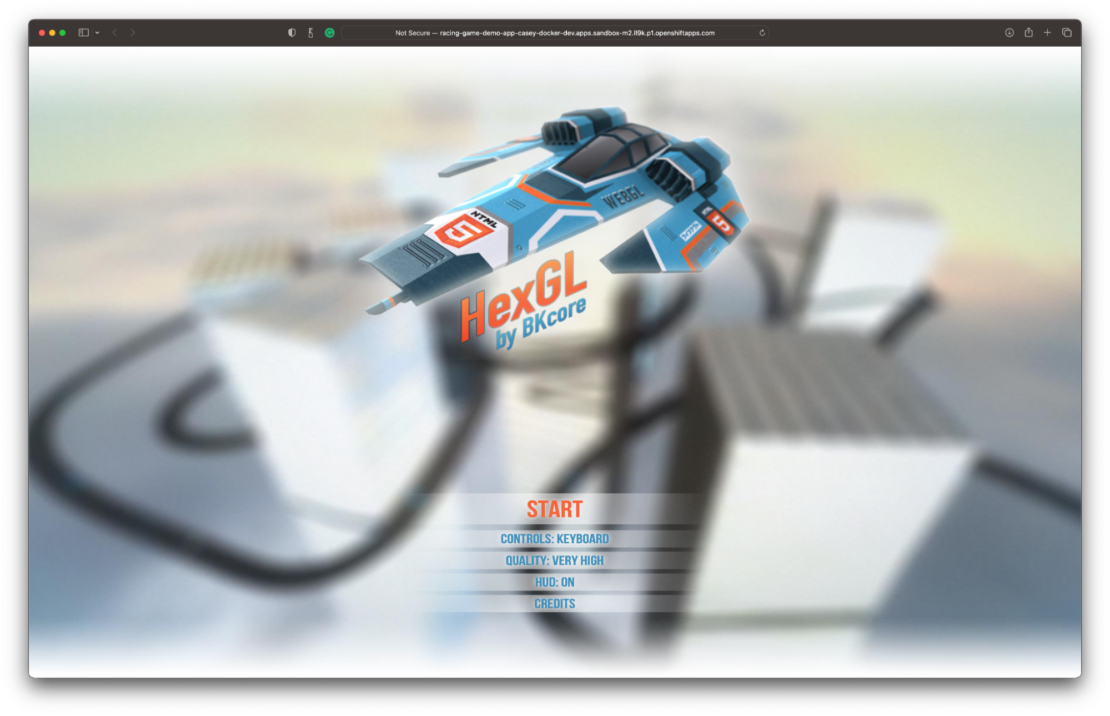
Finally, the extension will display the URL for the app and attempt to open your default browser to show it off:
Cleanup
Once you’re done with your app, or before attempting to redeploy it, use the web terminal to all traces of your deployment using this one-liner:
1 | oc get all -oname | grep sample-racing-game | xargs oc delete |
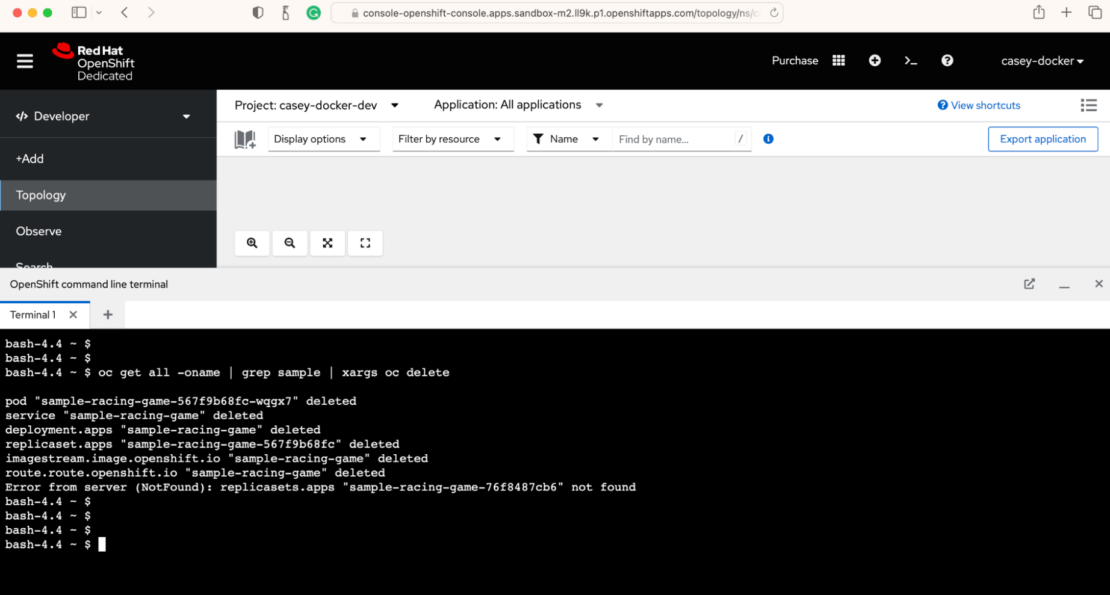
That will avoid unnecessarily using resources and any errors if you try to redeploy to the same namespace later.
So…what did we learn?
The Red Hat OpenShift extension gives you a one-click deploy from Docker Desktop to an OpenShift cluster. It’s especially convenient for previewing iterative work in a shared cluster for sprint demos and approval as a way to accelerate iteration.
The above steps showed you how to install and configure the extension, build an image, and deploy it to the cluster with a minimum of clicks. Now show us what you’ll build next with Docker and Red Hat, tag @docker on Twitter or me @misterbisson@techub.social to share!
Learn More
- Learn how to build and share a containerized app
- Integrating Docker with your IDE
- AI and ML with Docker
