Low-code and no-code platforms have risen sharply in popularity over the past few years. These platforms let users with little or no knowledge of coding build apps 20x faster with minimal coding. They’ve even evolved to a point where they’ve become indispensable tools for expert developers. Such platforms are highly visual and follow a user-friendly, modular approach. Consequently, you need to drag and drop software components into place — all of which are visually represented — to create an app.
Node-RED is a low-code programming language for event-driven applications. It’s a programming tool for wiring together hardware devices, APIs, and online services in new and interesting ways. Node-RED also provides a browser-based flow editor that makes it easy to wire together flows using the wide range of nodes within the palette. Accordingly, you can deploy it to its runtime with a single-click. Once more, you can create JavaScript functions within the editor using the rich-text editor. Finally, Node-RED ships with a built-in library that lets you save useful and reusable functions, templates or flows.
Node-RED’s lightweight runtime is built upon Node.js, taking full advantage of Node’s event-driven, non-blocking model. This helps it run at the edge of the network on low-cost hardware — like the Raspberry Pi and in the cloud. With over 225,000 modules in Node’s package repository, it’s easy to extend the range of palette nodes and add new capabilities.The flows created in Node-RED are stored using JSON, which is easily importable and exportable for sharing purposes. An online flow library lets you publish your best flows publicly.
Users have downloaded our Node-RED Docker Official Image over 100 million times from Docker Hub. What’s driving this significant download rate? There’s an ever-increasing demand for Docker containers to streamline development workflows, while giving Node-RED developers the freedom to innovate with their choice of project-tailored tools, application stacks, and deployment environments. Our Node-RED Official Image also supports multiple architectures like amd64, arm32v6, arm32v7, arm64v8, and s390x.
Why is containerizing Node-RED important?
The Node-RED Project has a huge community of third-party nodes available for installation. Also, note that the community doesn’t generally recommend using an odd-numbered Node version. This advice is tricky for new users, since they might end up fixing Node compatibility issues.
Running your Node-RED app in a Docker container lets users get started quickly with sensible defaults and customization via environmental variables. Users no longer need to worry about compatibility issues. Next, Docker enables users to build, share, and run containerized Node-RED applications — made accessible for developers of all skill levels.
Building your application
In this tutorial, you’ll learn how to build a retail store items detection system using Node-RED. First, you’ll set up Node-RED manually on an IoT Edge device without Docker. Second, you’ll learn how to run it within a Docker container via a one-line command. Finally, you’ll see how Docker containers help you build and deploy this detection system using Node-RED. Let’s jump in.
Hardware components
- Seeed Studio reComputer J1010 with Jetson Nano
- USB/IP camera module
- Ethernet cable/USB WiFi adapter
- Keyboard and mouse
Software Components
Preparing your Seeed Studio reComputer and development environment
For this demonstration, we’re using a Seeed Studio reComputer. The Seeed Studio reComputer J1010 is powered by the Jetson Nano development kit. It’s a small, powerful, palm-sized computer that makes modern AI accessible to embedded developers. It’s built around the NVIDIA Jetson Nano system-on-module (SoM) and designed for edge AI applications.
Wire it up
Plug your WiFi adapter/Ethernet cable, Keyboard/Mouse, and USB camera into the reComputer system and turn it on using the power cable. Follow the steps to perform initial system startup.
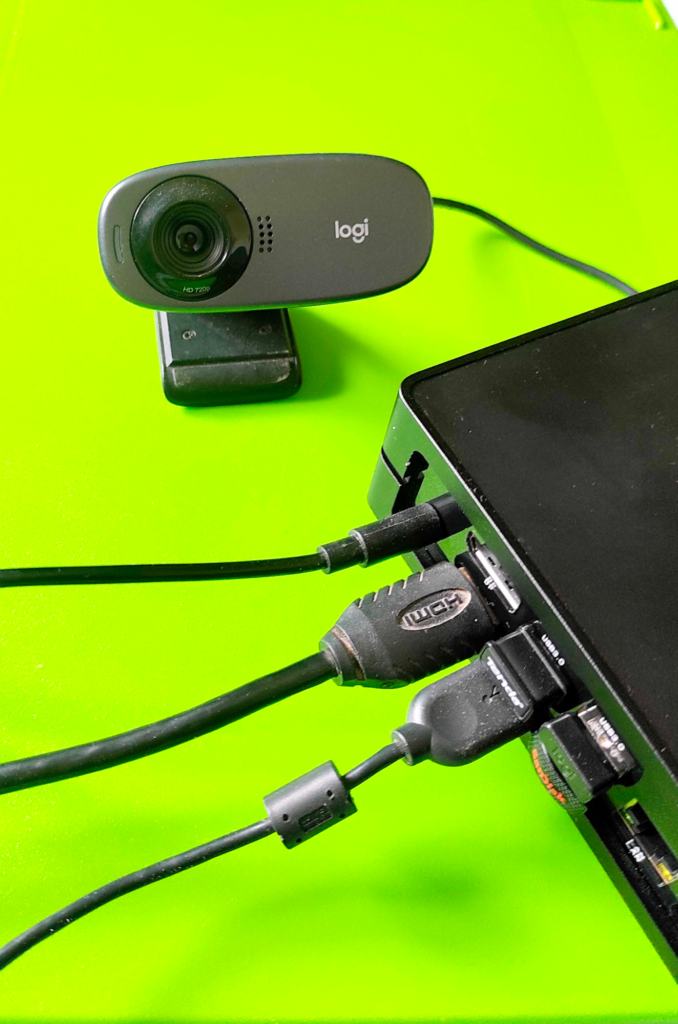
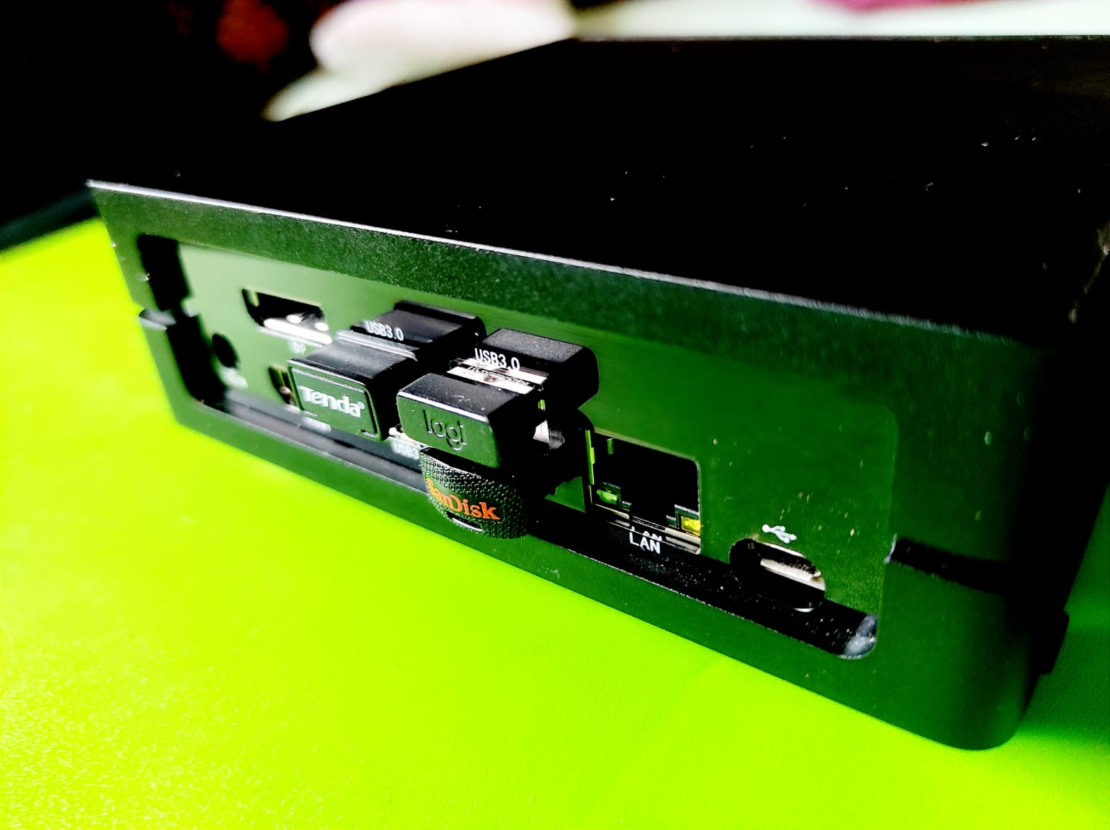
Before starting, make sure you have Node installed in your system. Then, follow these steps to set up Node-RED on your Edge device.
Installing Node.js
Ensure that you have the latest stable version of Node.js installed in your system.
curl -fsSL https://deb.nodesource.com/setup_16.x | sudo -E bash -
sudo apt-get install -y nodejs
Verify Node.js and npm versions
The above installer will install both Node.js and npm. Let’s verify that they’re installed properly:
# check Node.js version
nodejs -v
v16.16.0
# check npm version
npm -v
8.11.0
Installing Node-RED
To install Node-RED, you can use the npm command that comes with Node.js:
sudo npm install -g --unsafe-perm node-red

changed 294 packages, and audited 295 packages in 17s

38 packages are looking for funding
run `npm fund` for details

found 0 vulnerabilities
Running Node-RED
Use the node-red command to start Node-RED in your terminal:
node-red
27 Jul 15:08:36 - [info]

Welcome to Node-RED
===================

27 Jul 15:08:36 - [info] Node-RED version: v3.0.1
27 Jul 15:08:36 - [info] Node.js  version: v16.16.0
27 Jul 15:08:36 - [info] Linux 4.9.253-tegra arm64 LE
27 Jul 15:08:37 - [info] Loading palette nodes
27 Jul 15:08:38 - [info] Settings file  : /home/ajetraina/.node-red/settings.js
27 Jul 15:08:38 - [info] Context store  : 'default' [module=memory]
27 Jul 15:08:38 - [info] User directory : /home/ajetraina/.node-red
27 Jul 15:08:38 - [warn] Projects disabled : editorTheme.projects.enabled=false
27 Jul 15:08:38 - [info] Flows file     : /home/ajetraina/.node-red/flows.json
27 Jul 15:08:38 - [info] Creating new flow file
27 Jul 15:08:38 - [warn]

---------------------------------------------------------------------
Your flow credentials file is encrypted using a system-generated key.

If the system-generated key is lost for any reason, your credentials
file will not be recoverable, you will have to delete it and re-enter
your credentials.

You should set your own key using the 'credentialSecret' option in
your settings file. Node-RED will then re-encrypt your credentials
file using your chosen key the next time you deploy a change.
---------------------------------------------------------------------

27 Jul 15:08:38 - [info] Server now running at http://127.0.0.1:1880/
27 Jul 15:08:38 - [warn] Encrypted credentials not found
27 Jul 15:08:38 - [info] Starting flows
27 Jul 15:08:38 - [info] Started flows
You can then access the Node-RED editor by navigating to http://localhost:1880 in your browser.
The log output shares some important pieces of information:
- Installed versions of Node-RED and Node.js
- Any errors encountered while trying to load the palette nodes
- The location of your Settings file and User Directory
- The name of the flow file currently being used
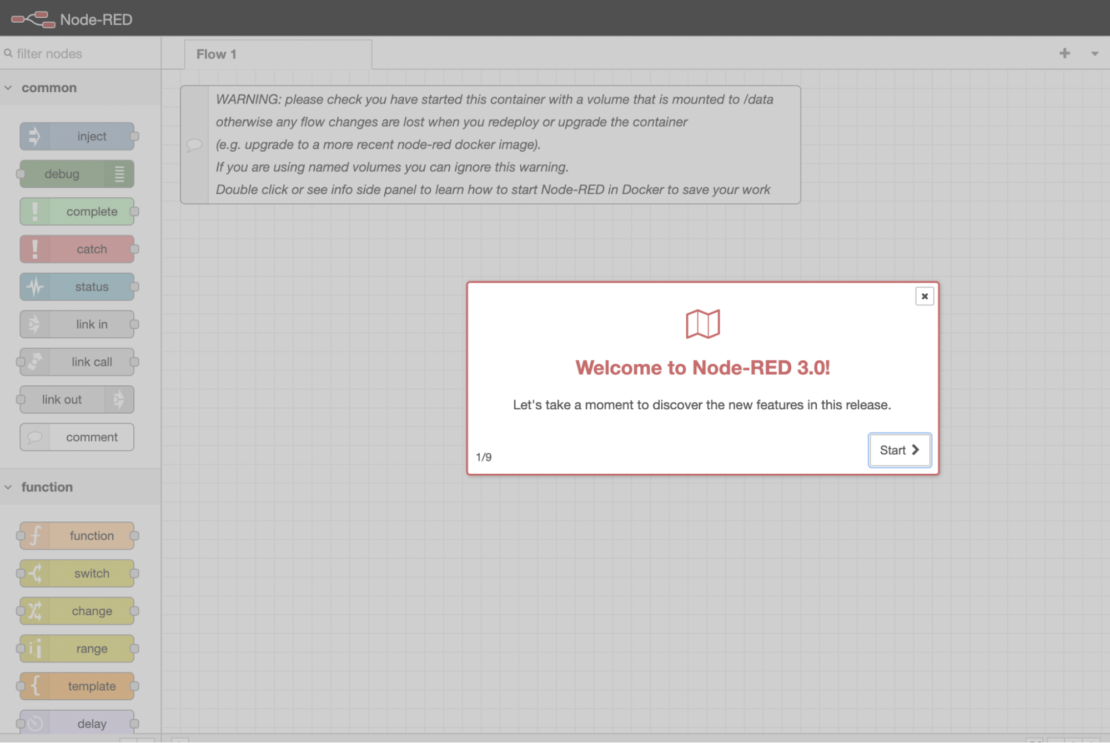
Node-RED consists of a Node.js based runtime that provides a web address to access the flow editor. You create your application in the browser by dragging nodes from your palette into a workspace, From there, you start wiring them together. With one click, Node-RED deploys your application back to the runtime where it’s run.
Running Node-RED in a Docker container
The Node-RED Official Image is based on our Node.js Alpine Linux images, in order to keep them as slim as possible. Run the following command to create and mount a named volume called node_red_data to the container’s /data directory. This will allow us to persist any flow changes.
docker run -it -p 1880:1880 -v node_red_data:/data --name mynodered nodered/node-red
You can now access the Node-RED editor via http://localhost:1880 or http://<ip_address_Jetson>:1880.
Building and running your retail store items detection system
To build a fully functional retail store items detection system, follow these next steps.
Write the configuration files
We must define a couple of files that add Node-RED configurations — such as custom themes and custom npm packages.
First, create an empty folder called “node-red-config”:
mkdir node-red-config
Change your directory to node-red-config and run the following command to setup a new NPM package.
npm init
This utility will walk you through the package.json file creation process. It only covers the most common items, and tries to guess sensible defaults.
{
"name": "node-red-project",
"description": "A Node-RED Project",
"version": "0.0.1",
"private": true,
"dependencies": {
"@node-red-contrib-themes/theme-collection": "^2.2.3",
"node-red-seeed-recomputer": "git+https://github.com/Seeed-Studio/node-red-seeed-recomputer.git"
}
}
Create a file called settings.js inside the node-red-config folder and enter the following content. This file defines Node-RED server, runtime, and editor settings. We’ll mainly change the editor settings. For more information about individual settings, refer to the documentation.
module.exports = {
flowFile: 'flows.json',
flowFilePretty: true,
uiPort: process.env.PORT || 1880,
logging: {
console: {
level: "info",
metrics: false,
audit: false
}
},
exportGlobalContextKeys: false,
externalModules: {
},
editorTheme: {
theme: "midnight-red",
page: {
title: "reComputer Flow Editor"
},
header: {
title: " Flow Editor&amp;amp;lt;br/&amp;amp;gt;",
image: "/data/seeed.webp", // or null to remove image
},
palette: {
},
projects: {
enabled: false,
workflow: {
mode: "manual"
}
},
codeEditor: {
lib: "ace",
options: {
theme: "vs",
}
}
},
functionExternalModules: true,
functionGlobalContext: {
},
debugMaxLength: 1000,
mqttReconnectTime: 15000,
serialReconnectTime: 15000,
}
You can download this image and put it under the node-red-config folder. This image file’s location is defined inside the settings.js file we just created.
Write the script
Create an empty file by running the following command:
touch docker-ubuntu.sh
In order to print colored output, let’s first define a few colors in the shell script. This will get reflected as an output when you execute the script at a later point of time:
IBlack='\033[0;90m'       # Black
IRed='\033[0;91m'         # Red
IGreen='\033[0;92m'       # Green
IYellow='\033[0;93m'      # Yellow
IBlue='\033[0;94m'        # Blue
IPurple='\033[0;95m'      # Purple
ICyan='\033[0;96m'        # Cyan
IWhite='\033[0;97m'       # White
The sudo command allows a normal user to run a command with elevated privileges so that they can perform certain administrative tasks. As this script involves running multiple tasks that involve administrative privileges, it’s always recommended to check if you’re running the script as a “sudo” user.
if ! [ $(id -u) = 0 ] ; then
echo "$0 must be run as sudo user or root"
exit 1
fi
The reComputer for Jetson is sold with 16 GB of eMMC. This ready-to-use hardware has Ubuntu 18.04 LTS and NVIDIA JetPack 4.6 installed, so the remaining user space available is about 2 GB. This could be a significant obstacle to using the reComputer for training and deployment in some projects. Hence, it’s sometimes important to remove unnecessary packages and libraries. This code snippet confirms that you have enough storage to install all included packages and Docker images.
If you have the required storage space, it’ll continue to the next section. Otherwise, the installer will ask if you want to free up some device space. Typing “y” for “yes” will delete unnecessary files and packages to clear some space.
storage=$(df | awk '{ print $4 } ' | awk 'NR==2{print}' )
#if storage &amp;amp;gt; 3.8G
if [ $storage -gt 3800000 ] ; then
echo -e "${IGreen}Your storage space left is $(($storage /1000000))GB, you can install this application."
else
echo -e "${IRed}Sorry, you don't have enough storage space to install this application. You need about 3.8GB of storage space."
echo -e "${IYellow}However, you can regain about 3.8GB of storage space by performing the following:"
echo -e "${IYellow}-Remove unnecessary packages (~100MB)"
echo -e "${IYellow}-Clean up apt cache (~1.6GB)"
echo -e "${IYellow}-Remove thunderbird, libreoffice and related packages (~400MB)"
echo -e "${IYellow}-Remove cuda, cudnn, tensorrt, visionworks and deepstream samples (~800MB)"
echo -e "${IYellow}-Remove local repos for cuda, visionworks, linux-headers (~100MB)"
echo -e "${IYellow}-Remove GUI (~400MB)"
echo -e "${IYellow}-Remove Static libraries (~400MB)"
echo -e "${IRed}So, please agree to uninstall the above. Press [y/n]"
read yn
if [ $yn = "y" ] ; then
echo "${IGreen}starting to remove the above-mentioned"
# Remove unnecessary packages, clean apt cache and remove thunderbird, libreoffice
apt update
apt autoremove -y
apt clean
apt remove thunderbird libreoffice-* -y
# Remove samples
rm -rf /usr/local/cuda/samples \
/usr/src/cudnn_samples_* \
/usr/src/tensorrt/data \
/usr/src/tensorrt/samples \
/usr/share/visionworks* ~/VisionWorks-SFM*Samples \
/opt/nvidia/deepstream/deepstream*/samples
# Remove local repos
apt purge cuda-repo-l4t-*local* libvisionworks-*repo -y
rm /etc/apt/sources.list.d/cuda*local* /etc/apt/sources.list.d/visionworks*repo*
rm -rf /usr/src/linux-headers-*
# Remove GUI
apt-get purge gnome-shell ubuntu-wallpapers-bionic light-themes chromium-browser* libvisionworks libvisionworks-sfm-dev -y
apt-get autoremove -y
apt clean -y
# Remove Static libraries
rm -rf /usr/local/cuda/targets/aarch64-linux/lib/*.a \
/usr/lib/aarch64-linux-gnu/libcudnn*.a \
/usr/lib/aarch64-linux-gnu/libnvcaffe_parser*.a \
/usr/lib/aarch64-linux-gnu/libnvinfer*.a \
/usr/lib/aarch64-linux-gnu/libnvonnxparser*.a \
/usr/lib/aarch64-linux-gnu/libnvparsers*.a
# Remove additional 100MB
apt autoremove -y
apt clean
else
exit 1
fi
fi
This code snippet checks if the required software (curl, docker, nvidia-docker2, and Docker Compose) is installed:
apt update

if ! [ -x "$(command -v curl)" ]; then
apt install curl
fi

if ! [ -x "$(command -v docker)" ]; then
apt install docker
fi

if ! [ -x "$(command -v nvidia-docker)" ]; then
apt install nvidia-docker2
fi

if ! [ -x "$(command -v docker-compose)" ]; then
curl -SL https://files.seeedstudio.com/wiki/reComputer/compose.tar.bz2  -o /tmp/compose.tar.bz2
tar xvf /tmp/compose.tar.bz2 -C /usr/local/bin
chmod +x  /usr/local/bin/docker-compose
fi
Next, you need to create a node-red directory under $HOME and then copy all your Node-RED configuration files to your device’s home directory as shown in the snippet below:
mkdir -p $HOME/node-red
cp node-red-config/*  $HOME/node-red
The below snippet allows the script to bring up container services using Docker Compose CLI:
docker compose --file docker-compose.yaml up -d
Note: You’ll see how to create a Docker Compose file in the next section.
Within the script, let’s specify the command to install a custom Node-RED theme package with three Node-RED blocks corresponding to video input, detection, and video view. We’ll circle back to these nodes later.
docker exec node-red-contrib-ml-node-red-1 bash -c "cd /data &amp;amp;amp;&amp;amp;amp; npm install"
Finally, the below command embedded in the script allows you to restart the node-red-contrib-ml-node-red-1 container to implement your theme changes:
docker restart node-red-contrib-ml-node-red-1
Lastly, save the script as docker-ubuntu.sh.
Define your services within a Compose file
Create an empty file by running the following command inside the same directory as docker-ubuntu.sh:
touch docker-compose.yaml
Add the following lines within your docker-compose.yml file. These specify which services Docker should initiate concurrently at application launch:
services:
node-red:
image: nodered/node-red:3.0.1
restart: always
network_mode: "host"
volumes:
- "$HOME/node-red:/data"
user: "0"
dataloader:
image: baozhu/node-red-dataloader:v1.2
restart: always
runtime: nvidia
network_mode: "host"
privileged: true
devices:
- "/dev:/dev"
- "/var/run/udev:/var/run/udev"
detection:
image: baozhu/node-red-detection:v1.2
restart: always
runtime: nvidia
network_mode: "host"
Your application has the following parts:
- Three services backed by Docker images: your Node-RED
node-redapp,dataloader, anddetection - The
dataloaderservice container will broadcast an OpenCV video stream (either from a USB webcam or an IP camera with RTSP) using the Pub/Sub messaging pattern toport 5550. It’s important to note that one needs to pass privileged:true to allow your service containers to get access to USB camera devices. - The
detectionservice container will grab the above video stream and perform inference using TensorRT implementation of YOLOv5. This is an object-detection algorithm that can identify objects in real-time.
Execute the script
Open your terminal and run the following command:
sudo ./docker-ubuntu.sh
It’ll take approximately 2-3 minutes for these scripts to execute completely.
View your services
Once your script is executed, you can verify that your container services are up and running:
docker compose ps

CONTAINER ID   IMAGE                             COMMAND                  CREATED          STATUS                        PORTS     NAMES
e487c20eb87b   baozhu/node-red-dataloader:v1.2   "python3 python/pub_…"   48 minutes ago   Up About a minute                       retail-store-items-detection-nodered-dataloader-1
4441bc3c2a2c   baozhu/node-red-detection:v1.2    "python3 python/yolo…"   48 minutes ago   Up About a minute                       retail-store-items-detection-nodered-detection-1
dd5c5e37d60d   nodered/node-red:3.0.1            "./entrypoint.sh"        48 minutes ago   Up About a minute (healthy)             retail-store-items-detection-nodered-node-red-1
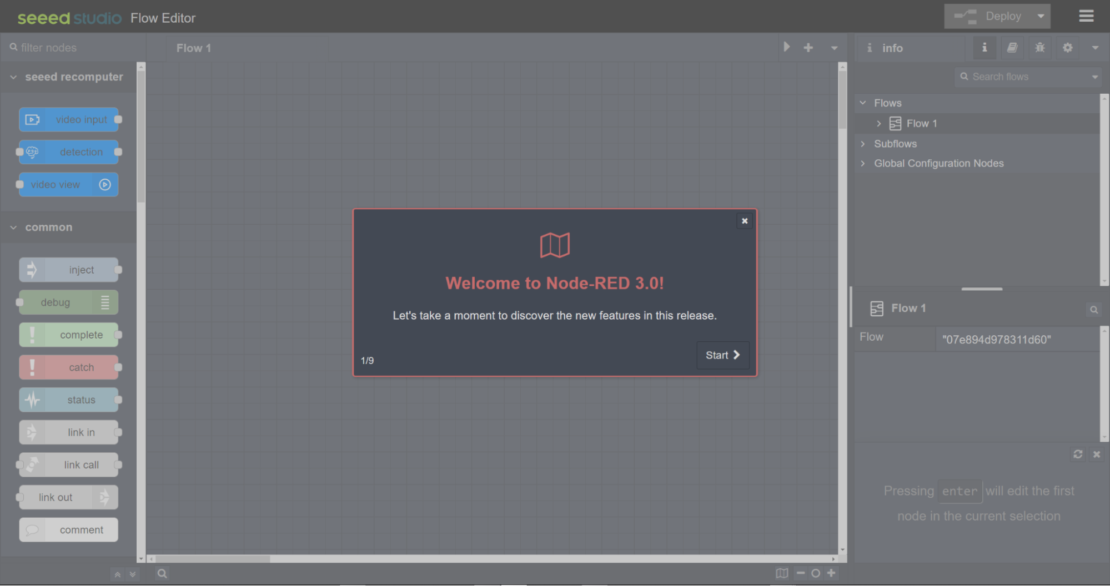
Visit http://127.0.0.1:1880/ to access the app.
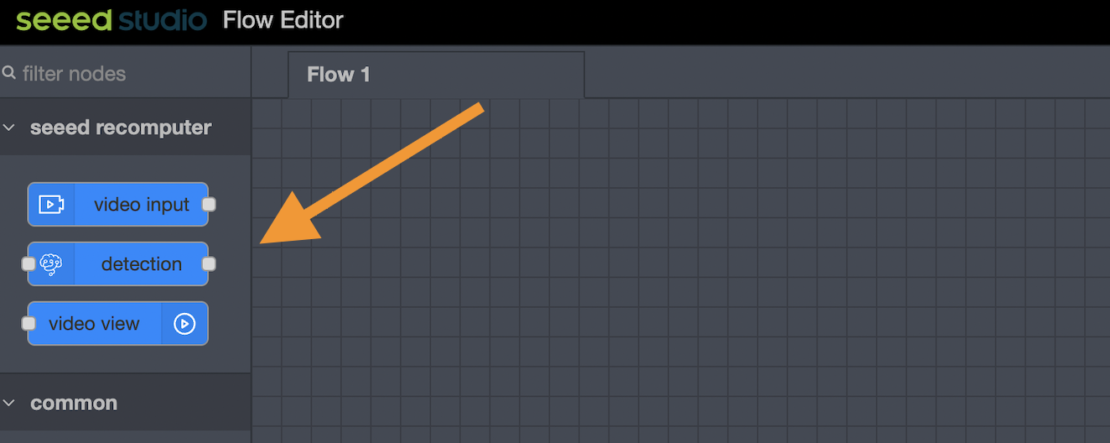
You’ll find built-in nodes (video input, detection, and video view) available in the palette:
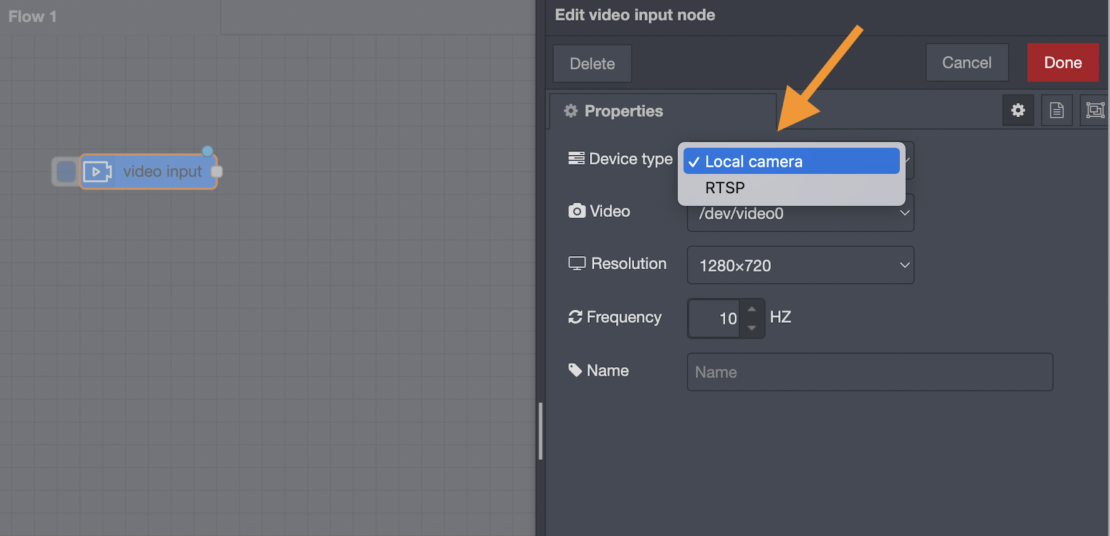
Let’s try to wire nodes by dragging them one-by-one from your palette into a workspace. First, let’s drag video input from the palette to the workspace. Double-click “Video Input” to view the following properties, and select “Local Camera”.
Note: We choose a local camera here to grab the video stream from the connected USB webcam. However, you can also grab the video stream from an IP camera via RTSP.
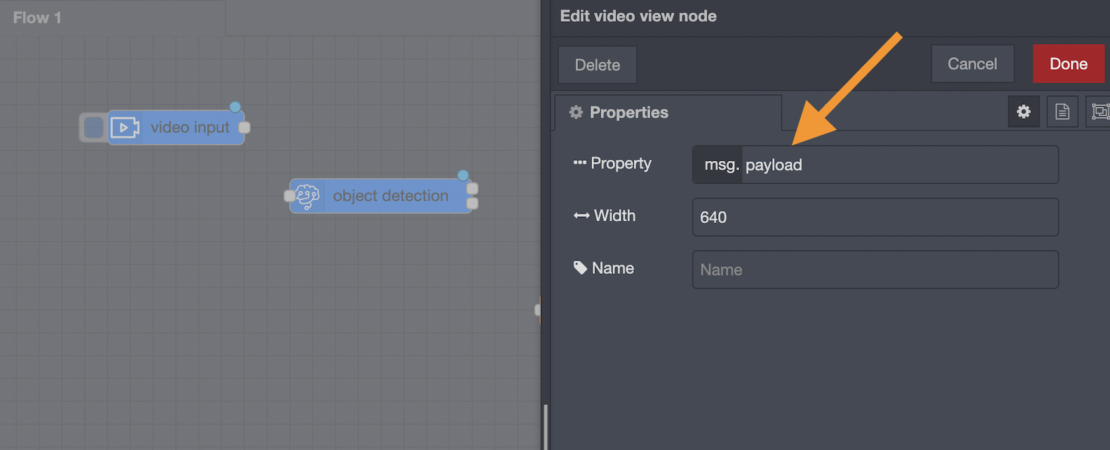
You’ll see that Node-RED chooses “COCO dataset” model name by default:

Next, drag Video View from the palette to the workspace. If you double-click on Video View, you’ll discover that msg.payload is already chosen for you under the Property section.
Wire up the nodes
Once you have all the nodes placed in the workspace, it’s time to wire nodes together. Nodes are wired together by pressing the left-mouse button on a node’s port, dragging to the destination node and releasing the mouse button (as shown in the following screenshot).
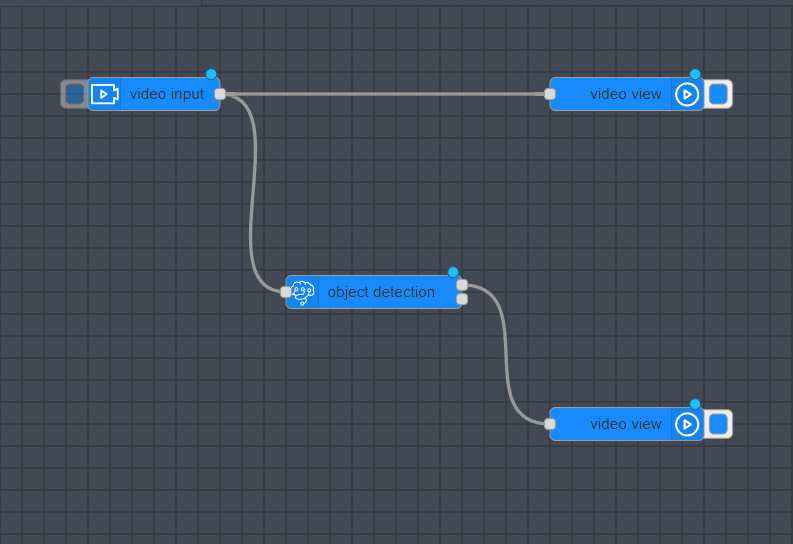
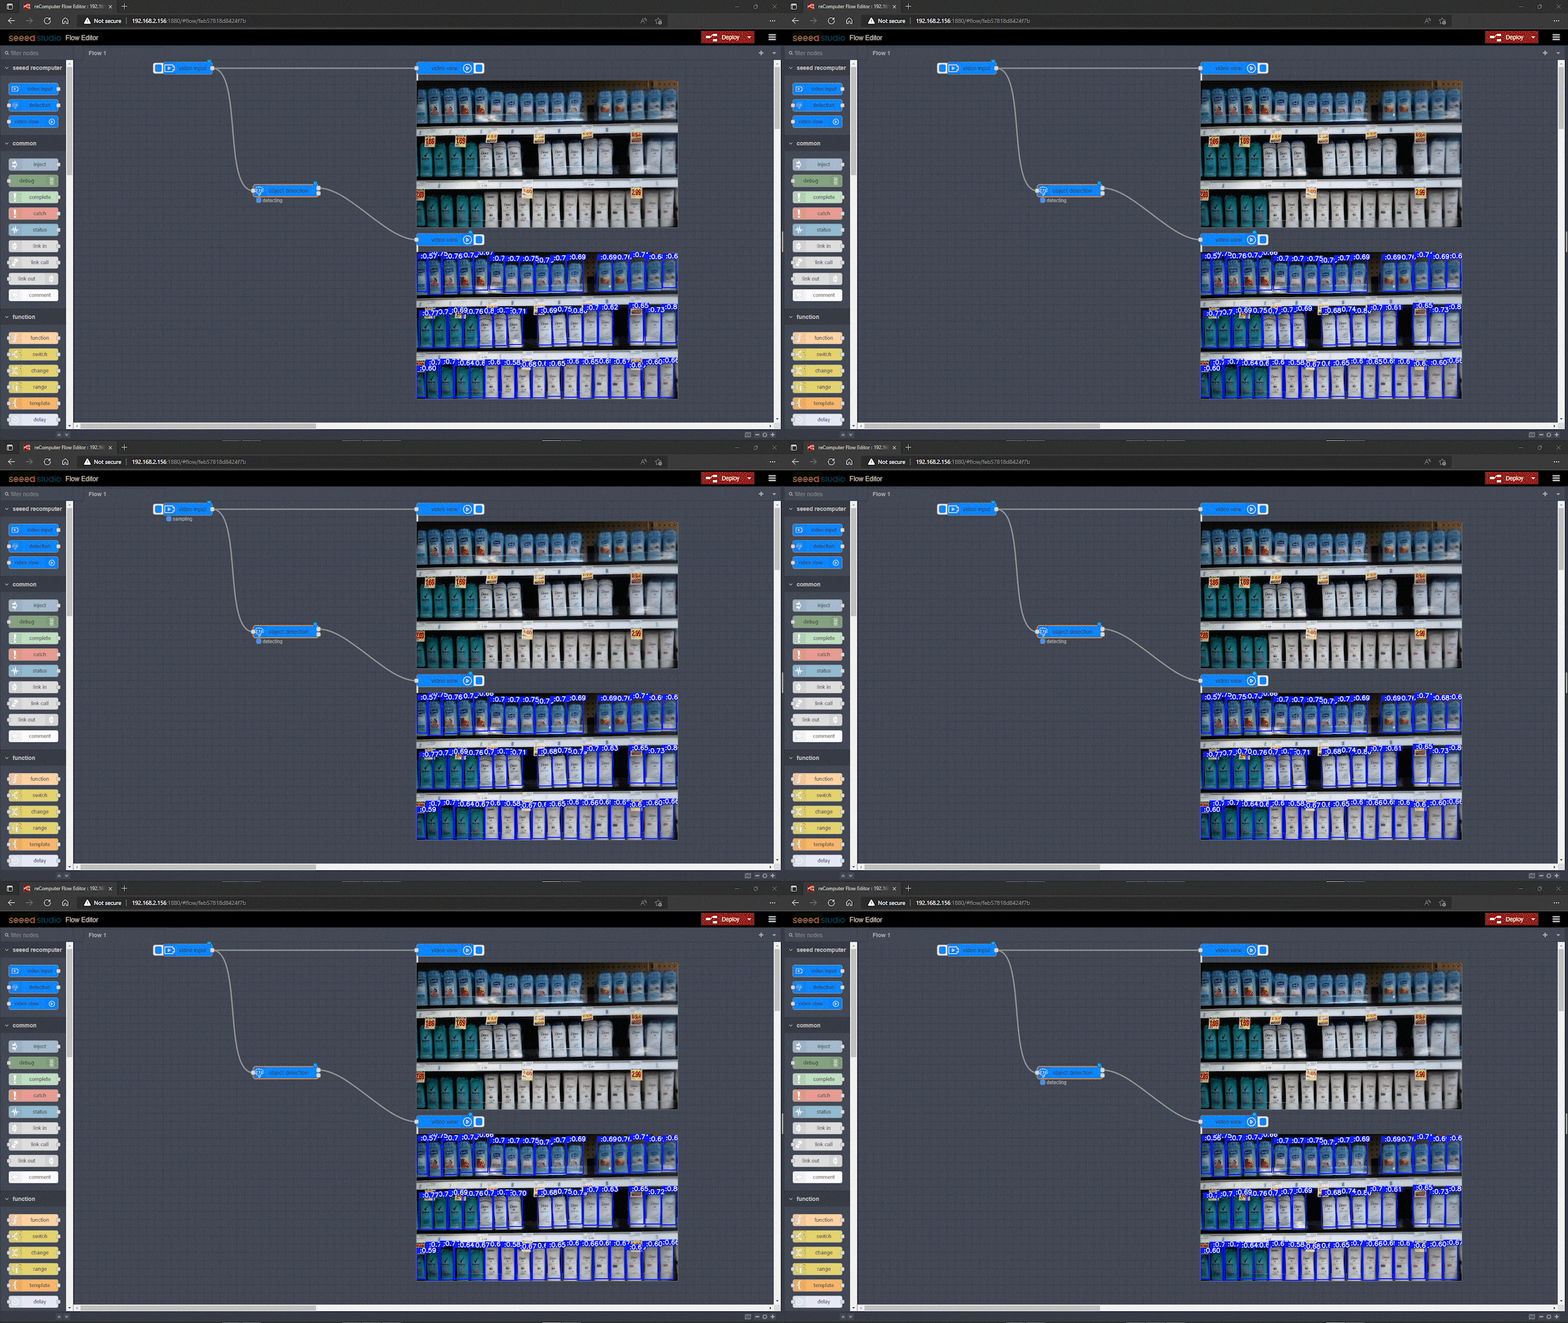
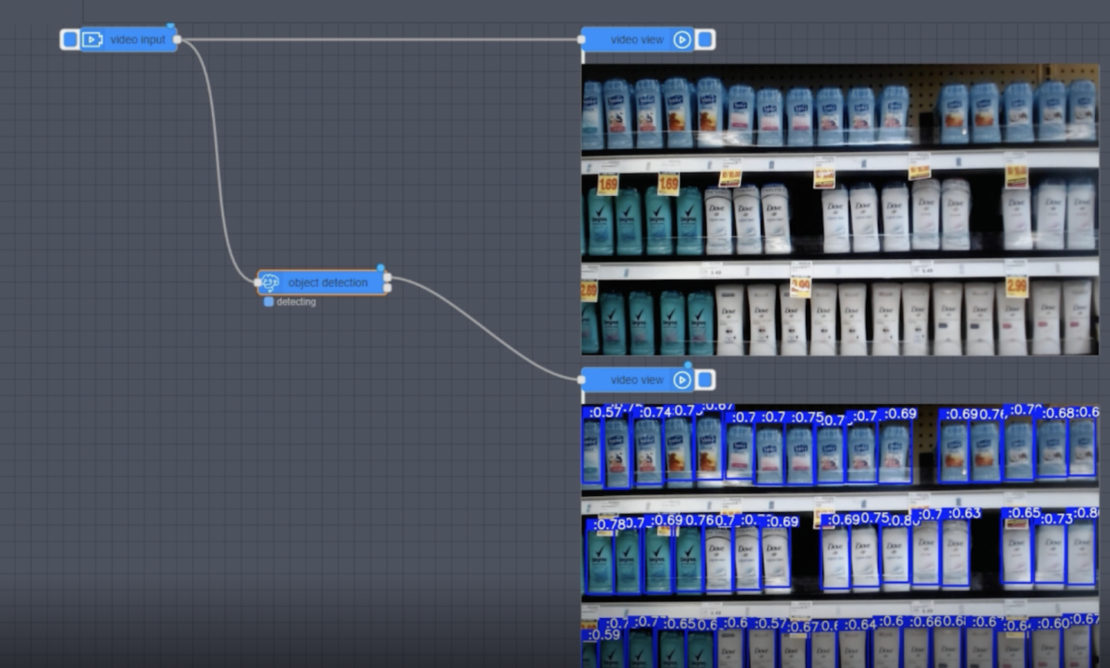
Trigger Deploy at the top right corner to start the deployment process. By now, you should be able to see the detection process working as Node-RED detects items.
Conclusion
The ultimate goal of modernizing software development is to deliver high-value software to end users even faster. Low-code technology like Node-RED and Docker help us achieve this by accelerating the time from ideation to software delivery. Docker helps accelerate the process of building, running, and sharing modern AI applications.
Docker Official Images help you develop your own unique applications — no matter what tech stack you’re accustomed to. With one YAML file, we’ve demonstrated how Docker Compose helps you easily build Node-RED apps. We can even take Docker Compose and develop real-world microservices applications. With just a few extra steps, you can apply this tutorial while building applications with much greater complexity. Happy coding!


