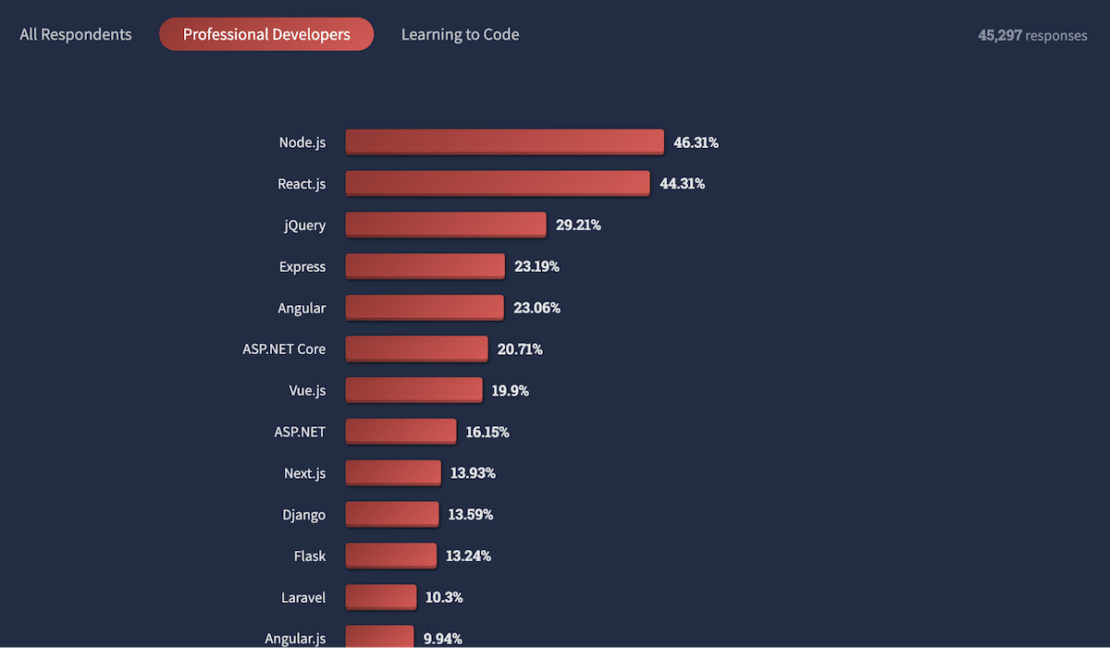
The MERN Stack is a fast growing, open source JavaScript stack that’s gained huge momentum among today’s web developers. MERN is a diverse collection of robust technologies (namely, Mongo, Express, React, and Node) for developing scalable web applications — supported by frontend, backend, and database components. Node, Express, and React even ranked highly among most-popular frameworks or technologies in Stack Overflow’s 2022 Developer Survey.
How does the MERN Stack work?
MERN has four components:
- MongoDB – a NoSQL database
- ExpressJS – a backend web-application framework for NodeJS
- ReactJS – a JavaScript library for developing UIs from UI components.
- NodeJS – a JavaScript runtime environment that enables running JavaScript code outside the browser, among other things
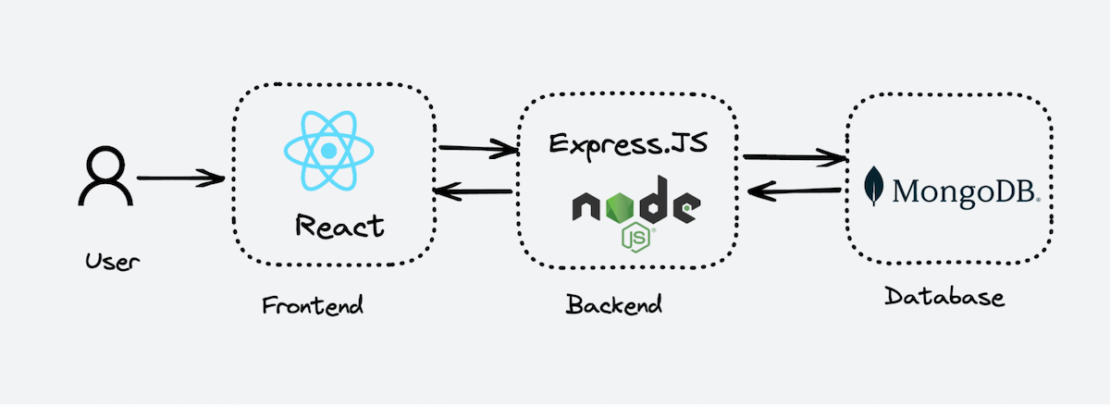
Here’s how those pieces interact within a typical application:
- A user interacts with the frontend, via the web browser, which is built with ReactJS UI components.
- The backend server delivers frontend content, via ExpressJS running atop NodeJS.
- Data is fetched from the MongoDB database before it returns to the frontend. Here, your application displays it for the user.
- Any interaction that causes a data-change request is sent to the Node-based Express server.
Why is the MERN stack so popular?
MERN stack is popular due to the following reasons:
- Easy learning curve – If you’re familiar with JavaScript and JSON, then it’s easy to get started. MERN’s structure lets you easily build a three-tier architecture (frontend, backend, database) with just JavaScript and JSON.
- Reduced context switching – Since MERN uses JavaScript for both frontend and backend development, developers don’t need to worry about switching languages. This boosts development efficiency.
- Open source and active community support – The MERN stack is purely open source. All developers can build robust web applications. Its frameworks improve the coding efficiency and promote faster app development.
- Model-view architecture – MERN supports the model-view-controller (MVC) architecture, enabling a smooth and seamless development process.
Running the Slack Clone app
Key Components
- MongoDB
- Express
- React.js
- Node
- Docker Desktop
Deploying a Slack Clone app is a fast process. You’ll clone the repository, set up the client and backend, then bring up the application. Complete the following steps:
git clone https://github.com/dockersamples/slack-clone-docker
cd slack-clone-docker
yarn install
yarn start
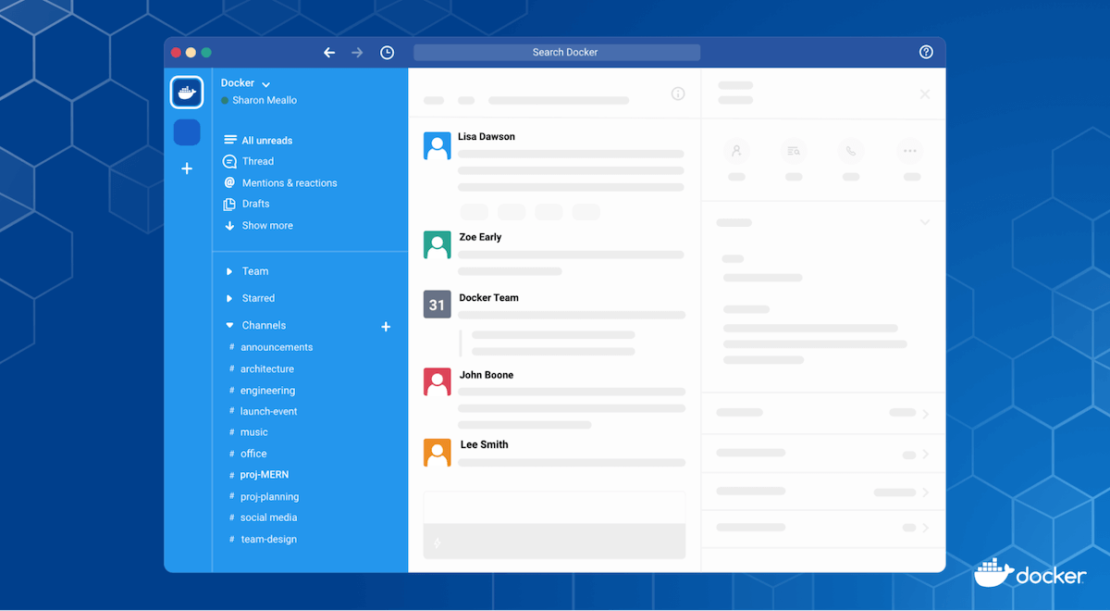
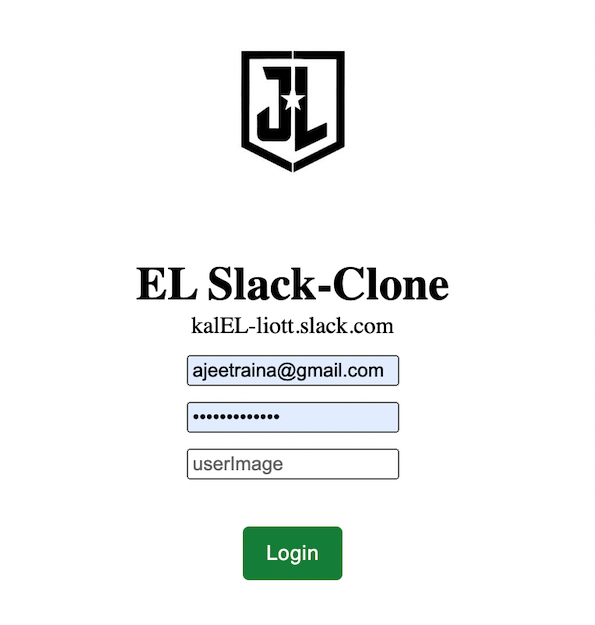
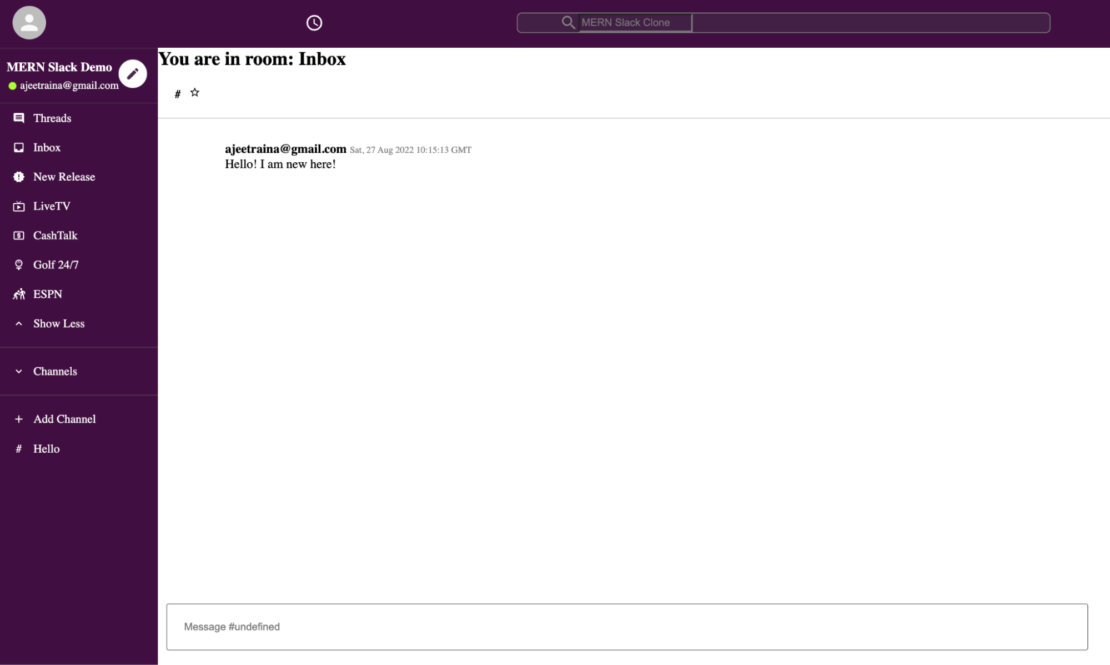
You can then access Slack Clone App at http://localhost:3000 in your browser:
Why containerize the MERN stack?
The MERN stack gives developers the flexibility to build pages on their server as needed. However, developers can encounter issues as their projects grow. Challenges with compatibility, third-party integrations, and steep learning curves are common for non-JavaScript developers.
First, For the MERN stack to work, developers must run a Node version that’s compatible with each additional stack component. Second, React extensively uses third-party libraries that might lower developer productivity due to integration hurdles and unfamiliarity. React is merely a library and might not help prevent common coding errors during development. Completing a large project with many developers becomes difficult with MERN.
How can you make things easier? Docker simplifies and accelerates your workflows by letting you freely innovate with your choice of tools, application stacks, and deployment environments for each project. You can set up a MERN stack with a single Docker Compose file. This lets you quickly create microservices. This guide will help you completely containerize your Slack clone app.
Containerizing your Slack clone app
Docker helps you containerize your MERN Stack — letting you bundle together your complete Slack clone application, runtime, configuration, and OS-level dependencies. This includes everything needed to ship a cross-platform, multi-architecture web application.
We’ll explore how to run this app within a Docker container using Docker Official Images. First, you’ll need to download Docker Desktop and complete the installation process. This includes the Docker CLI, Docker Compose, and a user-friendly management UI. These components will each be useful later on.
Docker uses a Dockerfile to create each image’s layers. Each layer stores important changes stemming from your base image’s standard configuration. Let’s create an empty Dockerfile in the root of our project repository.
Containerizing your React frontend
We’ll build a Dockerfile to containerize our React.js frontend and Node.js backend.
A Dockerfile is a plain-text file that contains instructions for assembling a Docker container image. When Docker builds our image via the docker build command, it reads these instructions, executes them, and creates a final image.
Let’s walk through the process of creating a Dockerfile for our application. First create the following empty file with the name Dockerfile.reactUI in the root of your React app:
touch Dockerfile.reactUI
You’ll then need to define your base image in the Dockerfile.reactUI file. Here, we’ve chosen the stable LTS version of the Node Docker Official Image. This comes with every tool and package needed to run a Node.js application:
FROM node:16
Next, let’s quickly create a directory to house our image’s application code. This acts as the working directory for your application:
WORKDIR /app
The following COPY instruction copies the package.json and src file from the host machine to the container image. The COPY command takes two parameters. The first tells Docker what file(s) you’d like to copy into the image. The second tells Docker where you want those files to be copied. We’ll copy everything into our working directory called /app:
COPY ./package.json ./package.json
COPY ./public ./public
Next, we need to add our source code into the image. We’ll use the COPY command just like we previously did with our package.json file:
COPY ./src ./src
Then, use yarn install to install the package:
RUN yarn install
The EXPOSE instruction tells Docker which port the container listens on at runtime. You can specify whether the port listens on TCP or UDP. The default is TCP if the protocol isn’t specified:
EXPOSE 3000
Finally, we’ll start a project by using the yarn start command:
CMD ["yarn","start"]
Here’s our complete Dockerfile.reactUI file:
FROM node:16
WORKDIR /app
COPY ./package.json ./package.json
COPY ./public ./public
COPY ./src ./src
RUN yarn install
EXPOSE 3000
CMD ["yarn","start"]
Now, let’s build our image. We’ll run the docker build command as above, but with the -f Dockerfile.reactUI flag. The -f flag specifies your Dockerfile name. The “.” command tells Docker to locate that Dockerfile in the current directory. The -t tags the resulting image:
docker build . -f Dockerfile.reactUI -t slackclone-fe:1
Containerizing your Node.js backend
Let’s walk through the process of creating a Dockerfile for our backend as the next step. First create the following empty Dockerfile.node in the root of your backend Node app (i.e server/ directory). Here’s your complete Dockerfile.node:
FROM node:16
WORKDIR /app
COPY ./package.json ./package.json
COPY ./server.js ./server.js
COPY ./messageModel.js ./messageModel.js
COPY ./roomModel.js ./roomModel.js
COPY ./userModel.js ./userModel.js
RUN yarn install
EXPOSE 9000
CMD ["node", "server.js"]
Now, let’s build our image. We’ll run the following docker build command:
docker build . -f Dockerfile.node -t slackclone-be:1
Defining services using a Compose file
Here’s how our services appear within a Docker Compose file:
services:
  slackfrontend:
    build:
      context: .
      dockefile: Dockerfile.reactUI
    ports:
      - "3000:3000"
    depends_on:
      - db
  nodebackend:
    build:
      context: ./server
      dockerfile: Dockerfile.node
    ports:
      - "9000:9000"
    depends_on:
      - db
  db:
    volumes:
      - slack_db:/data/db
    image: mongo:latest
    ports:
      - "27017:27017"
volumes:
   slack_db:
Your sample application has the following parts:
- Three services backed by Docker images: your React.js frontend, Node.js backend, and Mongo database
- A frontend accessible via
port 3000 - The
depends_onparameter, letting you create the backend service before the frontend service starts - One persistent named volume called
slack_db, which is attached to the database service and ensures the Mongo data is persisted across container restarts
You can clone the repository or download the docker-compose.yml file directly from here.
Bringing up the container services
You can start the MERN application stack by running the following command:
docker compose up -d —build
Then, use the docker compose ps command to confirm that your stack is running properly. Your terminal will produce the following output:
docker compose ps
               Name                             Command               State            Ports        -----------------------------------------------------------------------------
slack-clone-docker_db_1              docker-entrypoint.sh mongod      Up      0.0.0.0:27017->27017/tcp
slack-clone-docker_nodebackend_1     docker-entrypoint.sh node  ...   Up      0.0.0.0:9000->9000/tcp
slack-clone-docker_slackfrontend_1   docker-entrypoint.sh yarn  ...   Up      0.0.0.0:3000->3000/tcp
Viewing the containers via Docker Dashboard
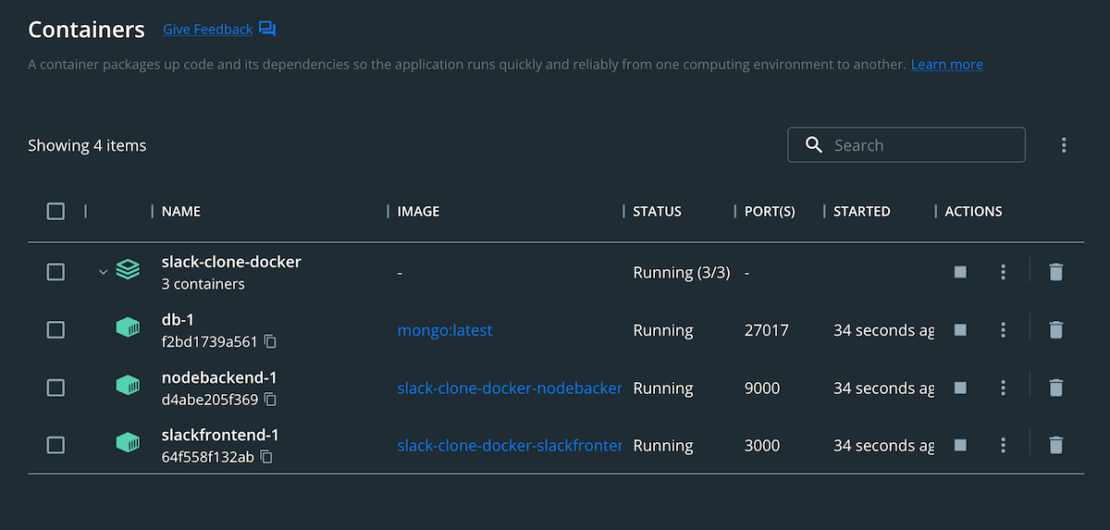
You can also leverage the Docker Dashboard to view your container’s ID and easily access or manage your application:
Viewing the Messages
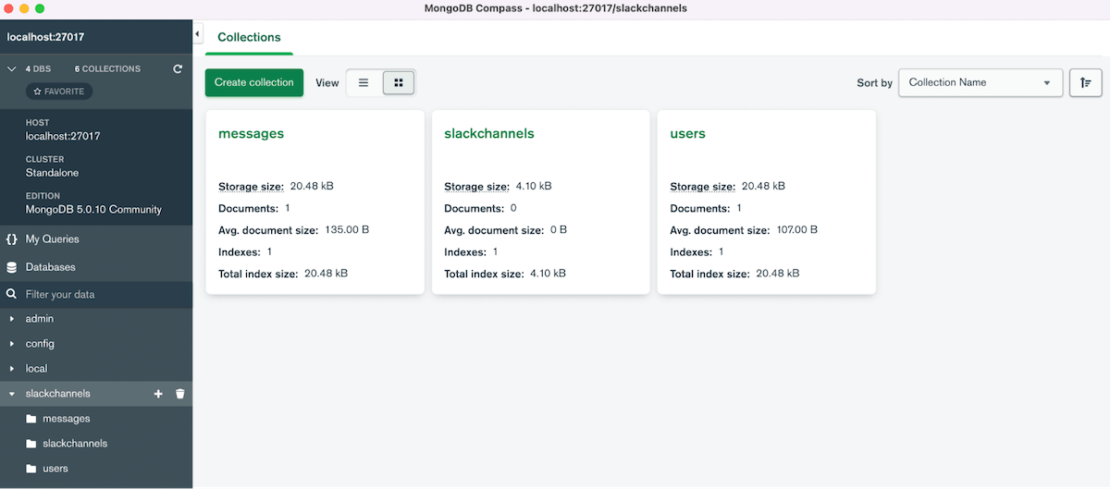
You can download and use Mongo Compass — an intuitive GUI for querying, optimizing, and analyzing your MongoDB data. This tool provides detailed schema visualization, real-time performance metrics, and sophisticated query abilities. It lets you view key insights, drag and drop to build pipelines, and more.
Conclusion
Congratulations! You’ve successfully learned how to containerize a MERN-backed Slack application with Docker. With a single YAML file, we’ve demonstrated how Docker Compose helps you easily build and deploy your MERN stack in seconds. With just a few extra steps, you can apply this tutorial while building applications with even greater complexity. Happy developing.
References:
- View the project source code
- Learn about MongoDB
- Get started with React
- Get started with ExpressJS
- Build Your NodeJS Docker image
