Docker Hub has two major constructs to help with managing users access to your repository images. Organizations and Teams. Organizations are a collection of Teams and Teams are a collection of DockerIDs.
There are a variety of ways of configuring your Teams within your Organization. In this blog post we’ll use a fictitious software company named Stark Industries which has a couple of development teams. One which works on the front-end of the application and the other that works on the back-end of the application. They also have a QA team and a DevOps team.
We’ll want to set up our Teams so that each engineering team can push and pull the images that they create. We’ll give the DevOps team access privileges to pull images from the dev teams repos and the ability to push images to the repos that they own. We’ll also give the QA team read-only access to all the repos.
Organizations
In Docker Hub, an organization is a collection of teams. Image repositories can be created at the organization level. We are also able to configure notifications and link to source code repositories.
Let’s set up our Organization.
Open your favorite browser and navigate to Docker Hub. If you do not already have a Docker ID you can create from the main page.
Login Hub with the account that you would like to be the owner of the Organization. Don’t worry if you are not 100% sure which Docker ID you would like to use as the owner, you can add more owners later if need be.
Once you are logged, navigate to the Organizations page by clicking on the Organization link in the top navigation bar.
Let’s create a new organization. Click on the “Create Organization” button in the top right. You will be presented with the option to choose between the Free Team or the Team plans. You can find more information about the plans on our pricing page.
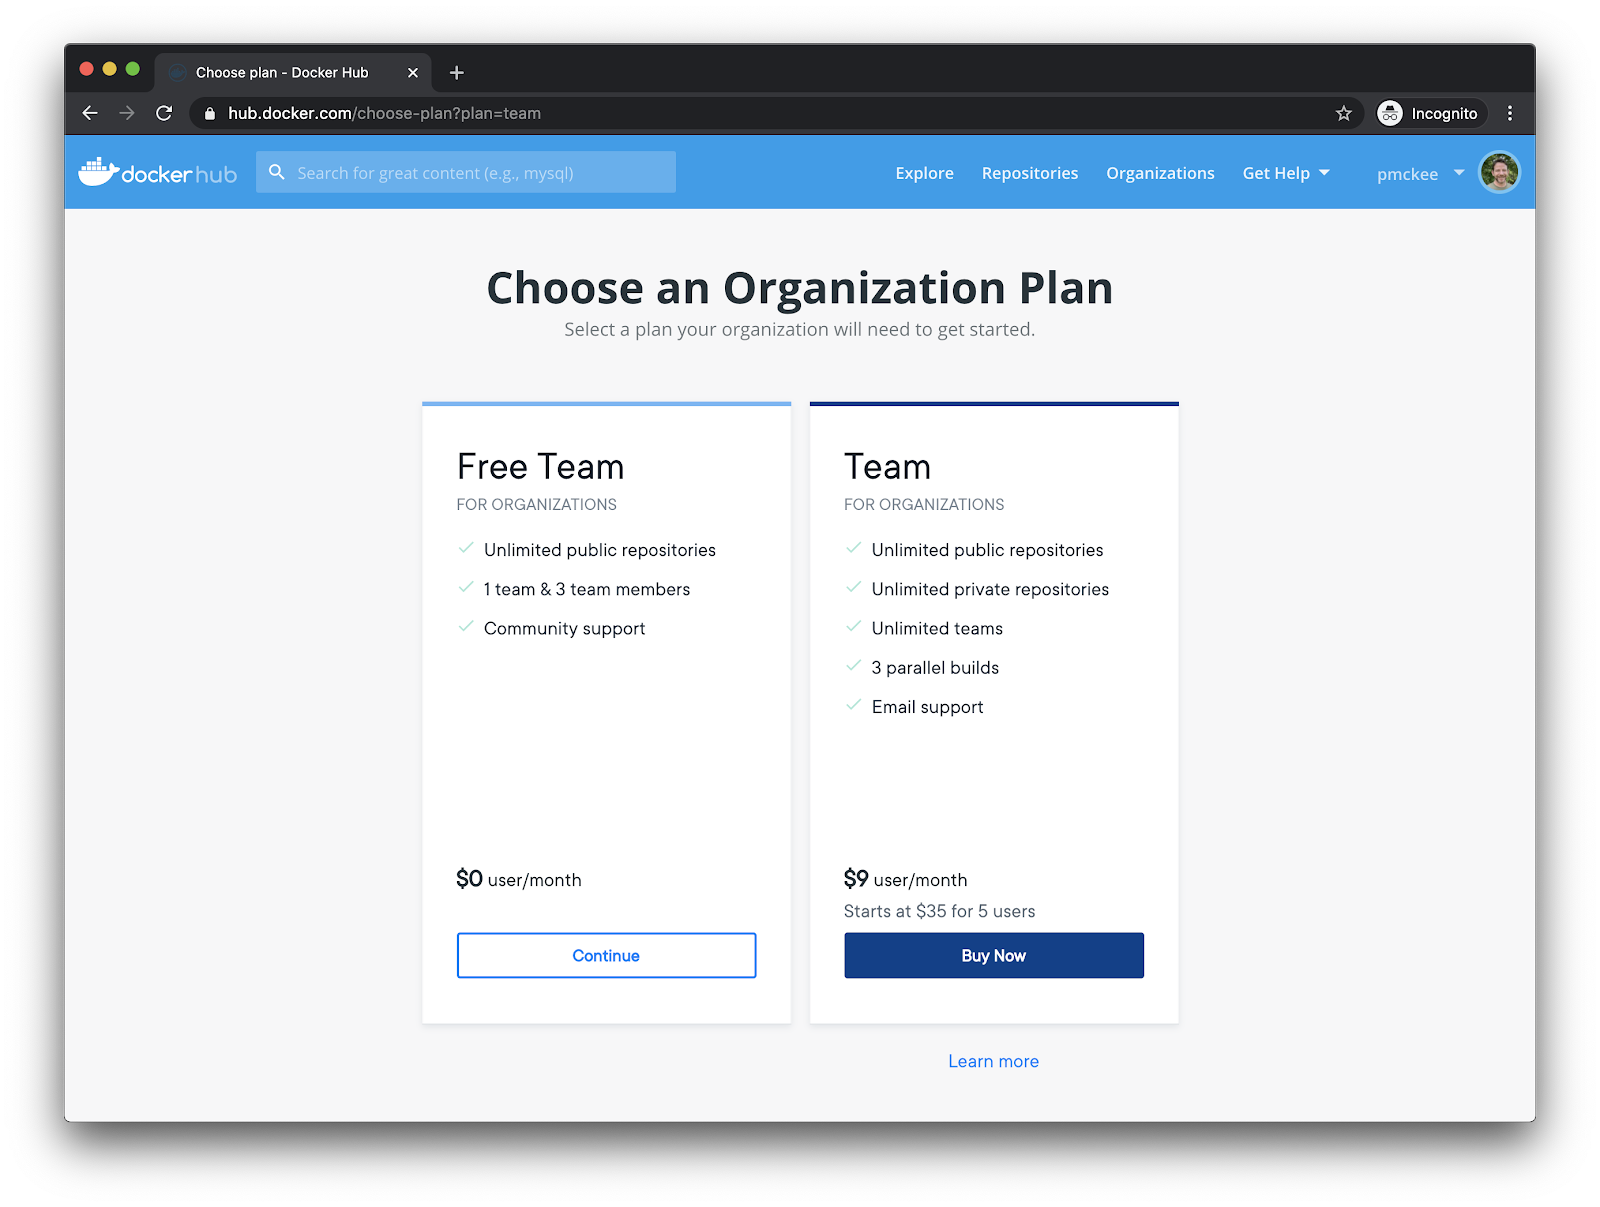
We will be using the Team plan in this blog post.
Once you’ve selected the Team plan, you’ll walk through the steps of setting up the Organization.
First enter the Organization’s name and description.
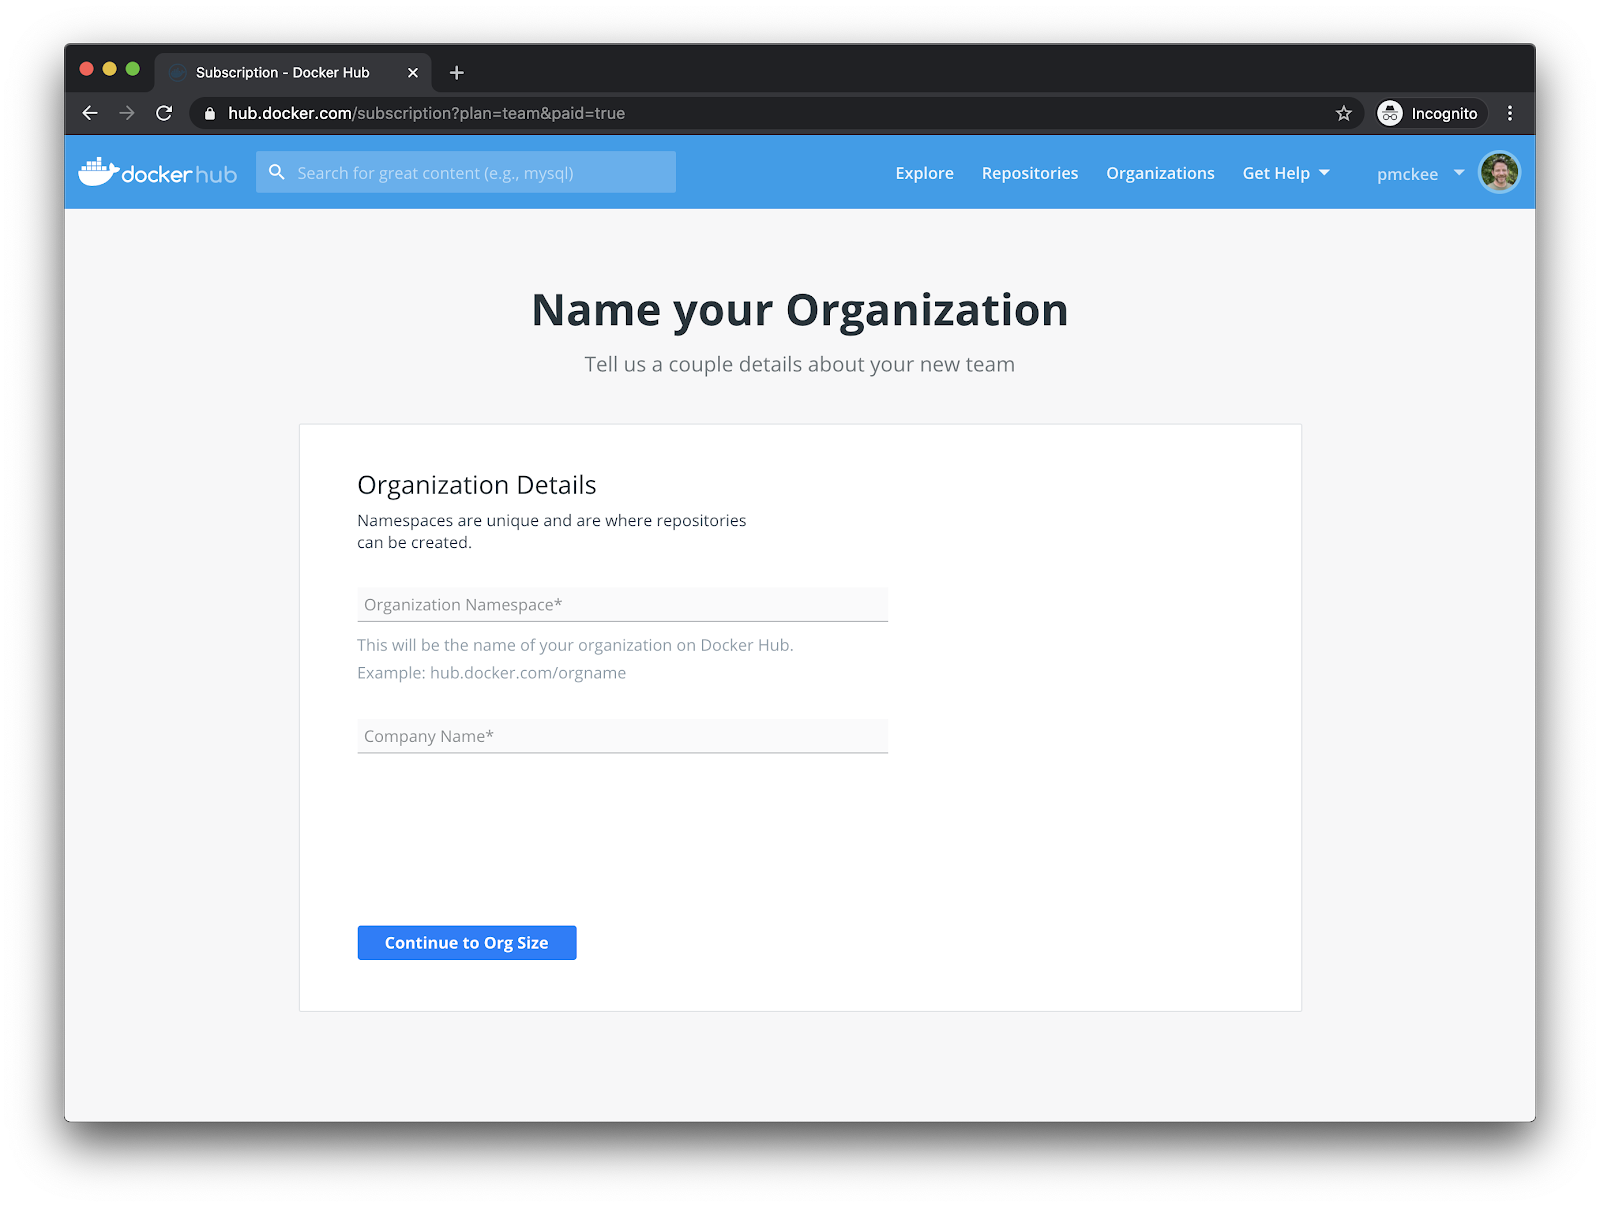
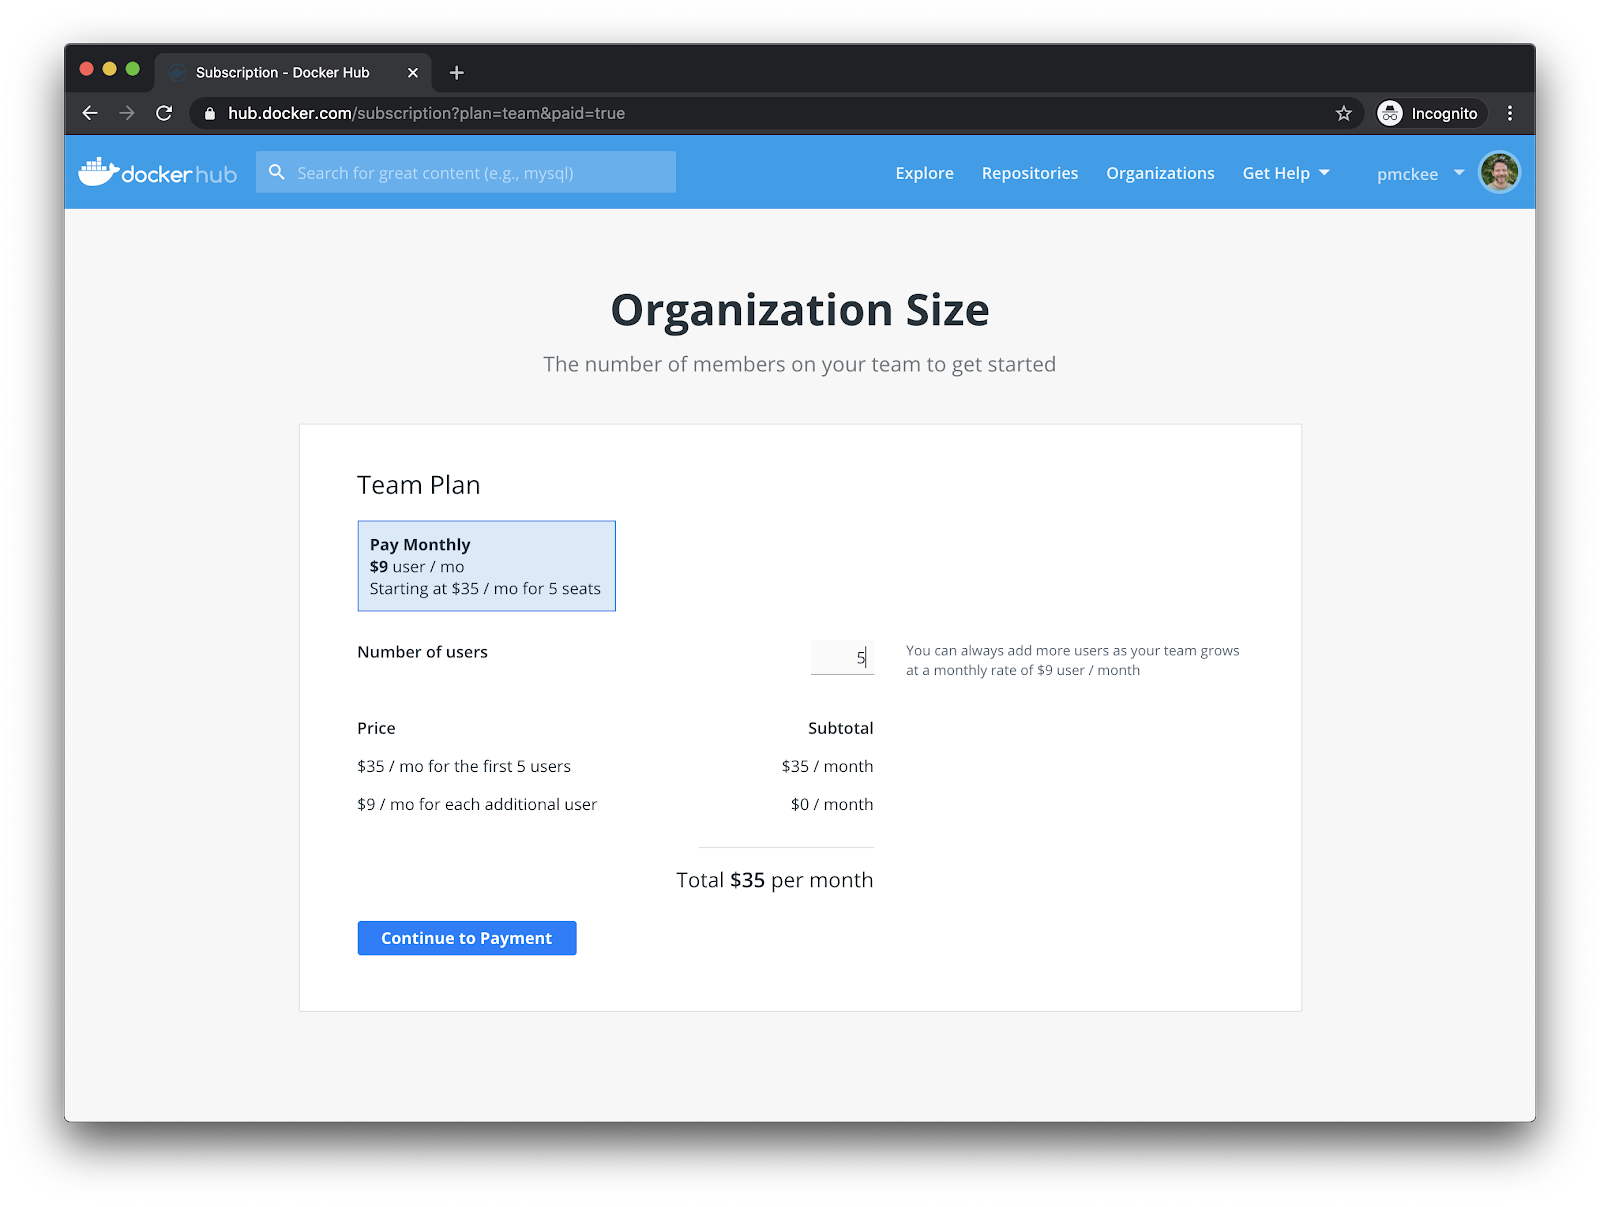
Now choose the number of users you would like to initially start with. The Team plan comes with 5 users and you can always add more later.
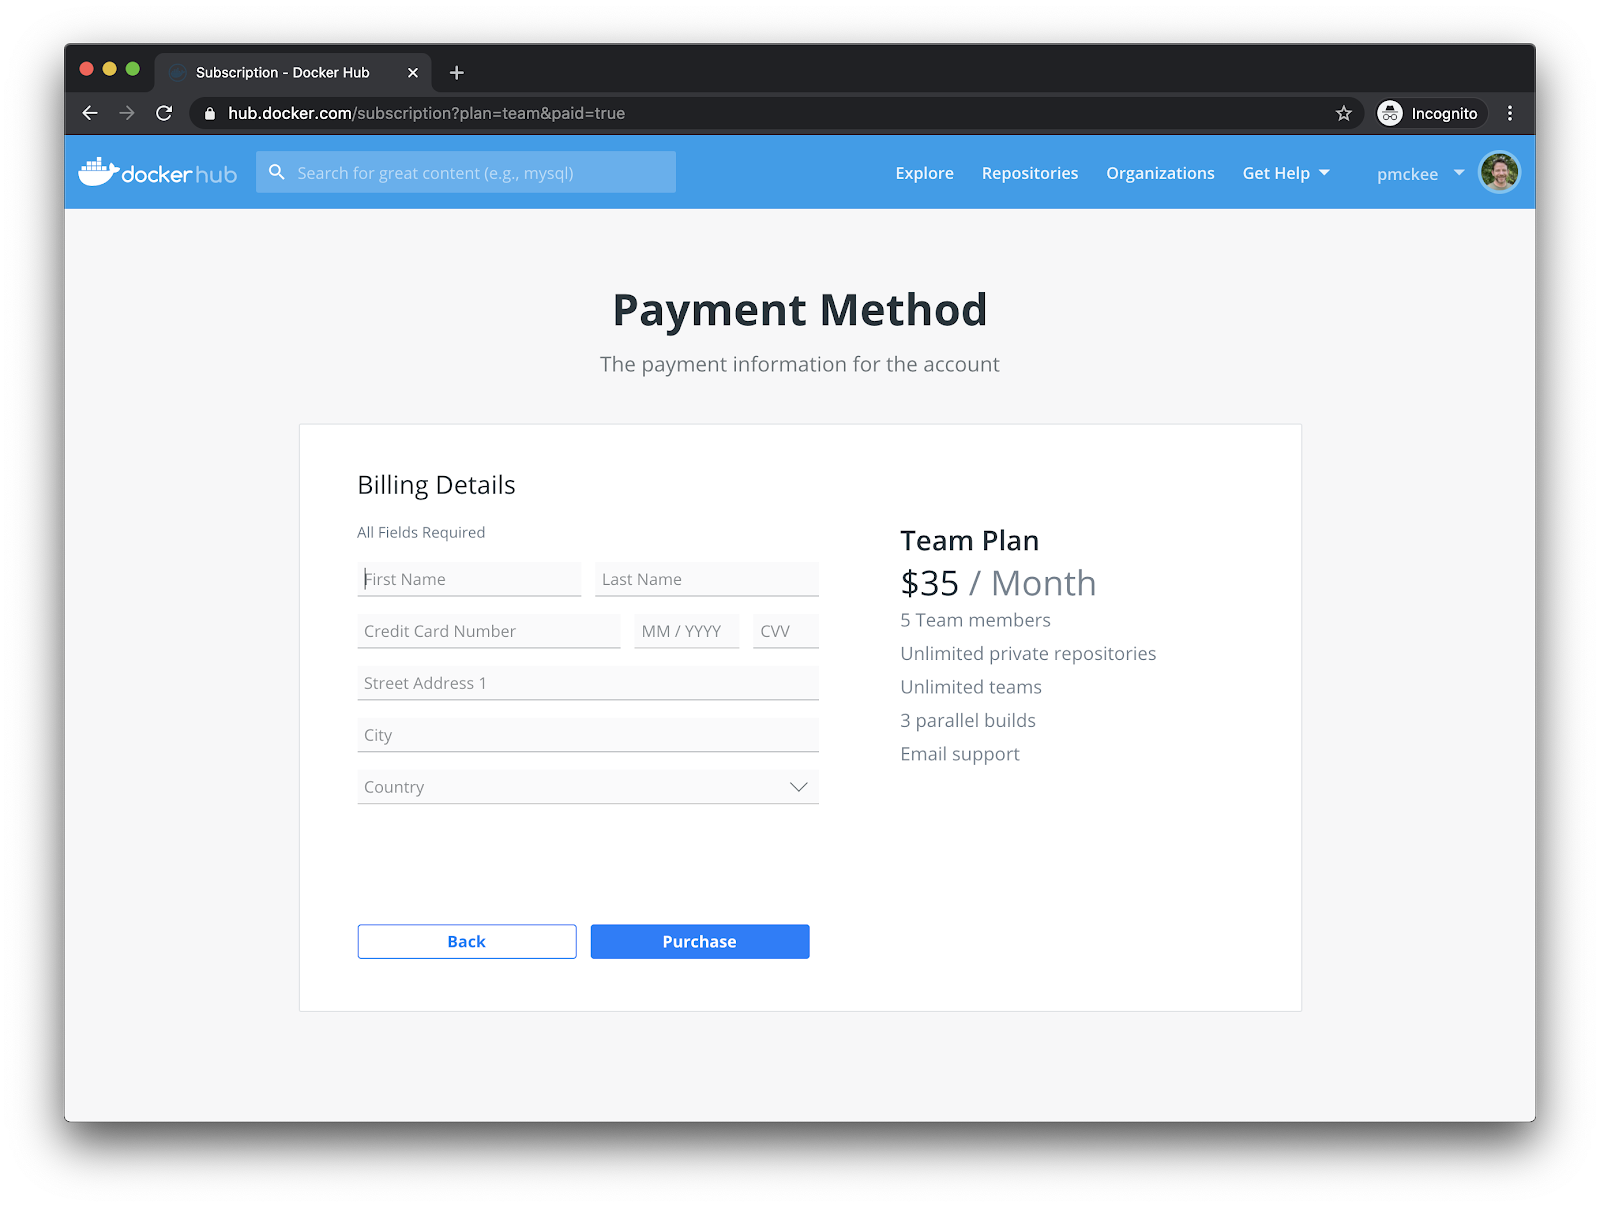
Now you’ll be presented with a screen to enter your payment information.
Once you click purchase and your credit card is approved, you will land on your newly created Organization home page.
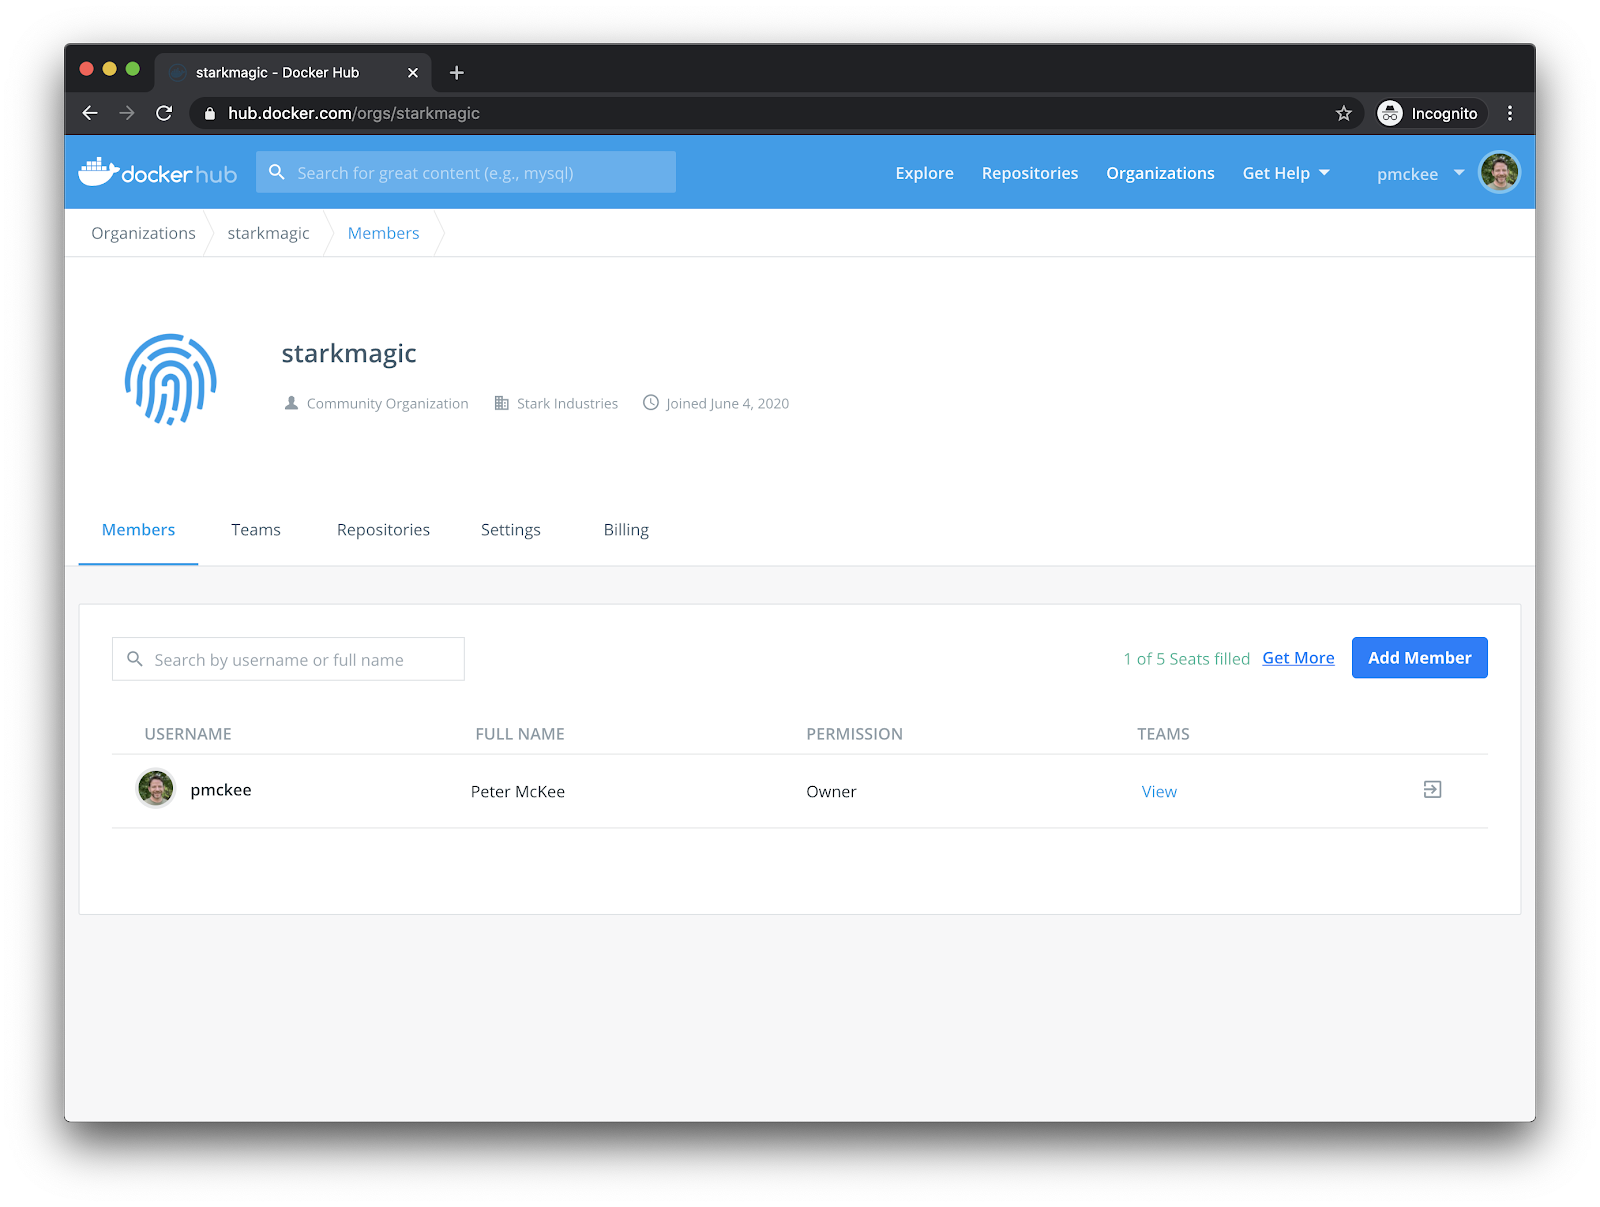
And there you have it, we’ve created our Organization that we can now start adding Teams to.
Teams
In Docker Hub, Teams are a collection of Docker IDs. We will use this construct to group users and assign privileges to image repositories that are owned by the Organization.
Let’s set up our Teams now.
Back on your organization’s homepage, click on the tab for Teams and then click the blue “Create Team” button.
Enter a name and description for your team.
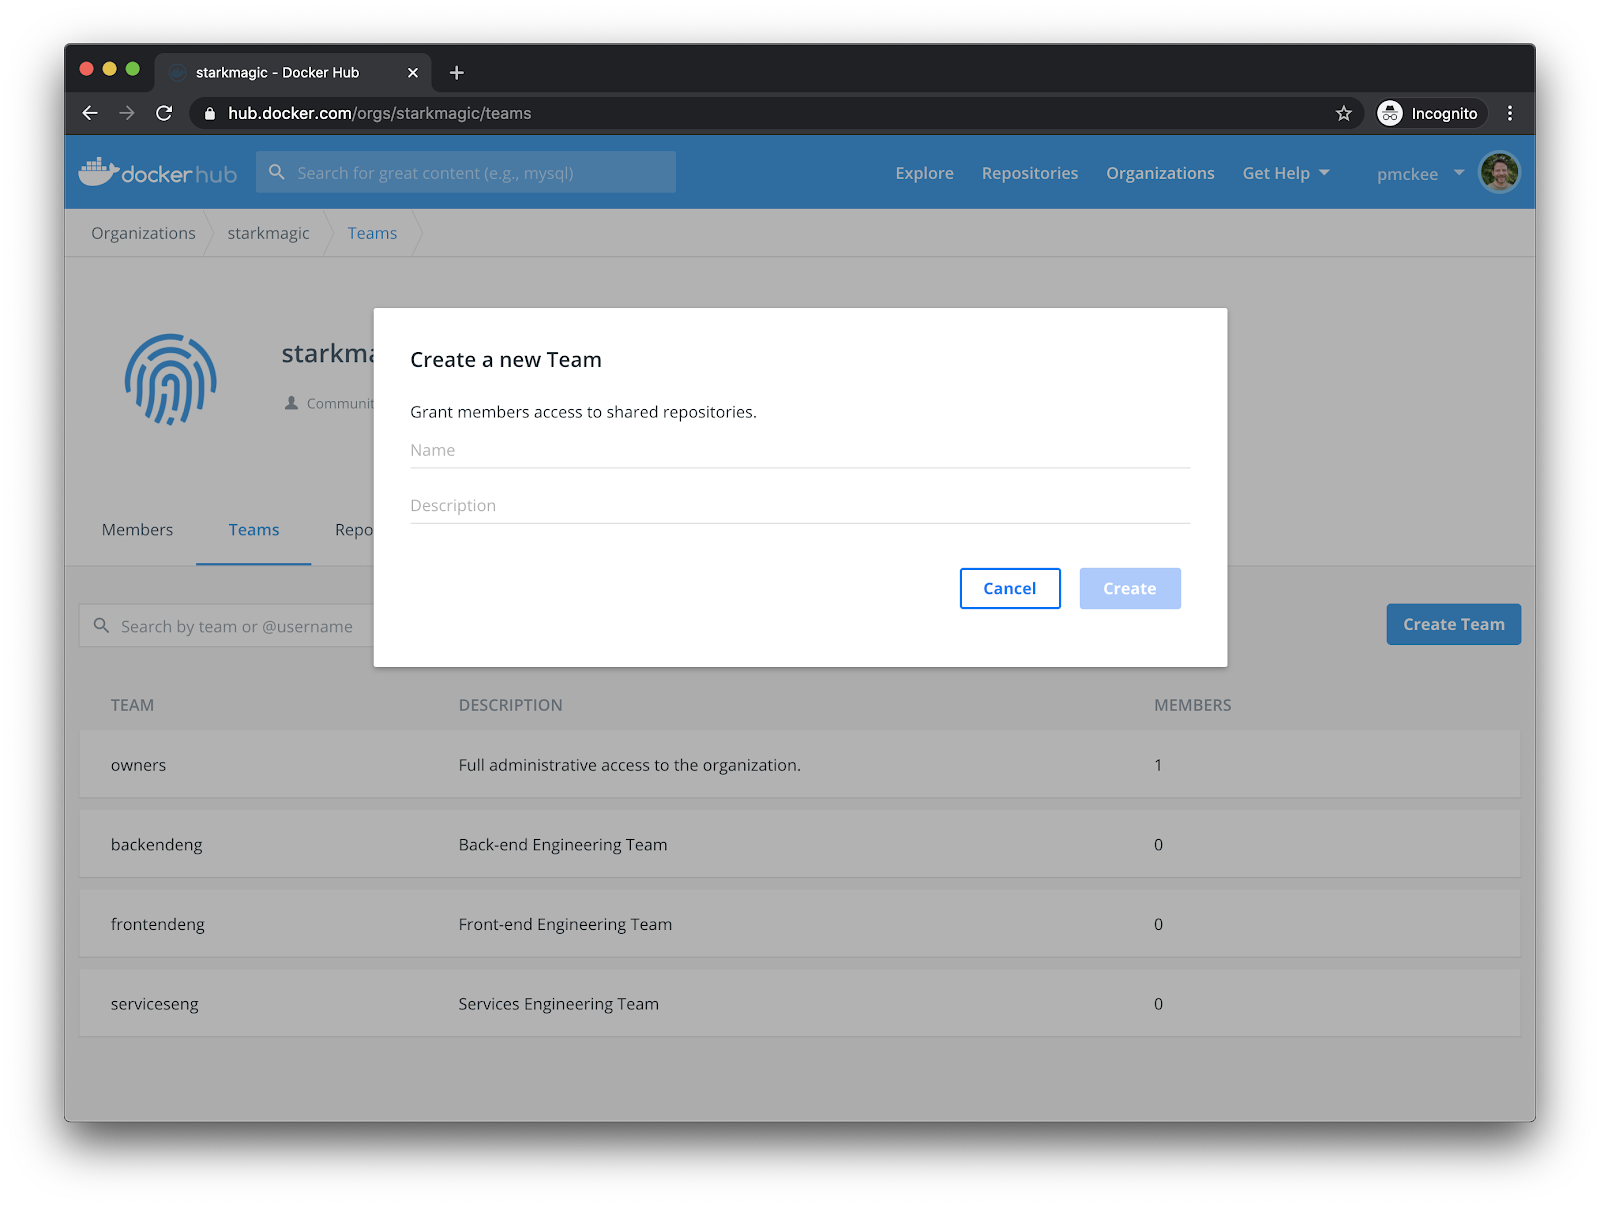
Create the following four teams:
- backendeng
Back-end Engineering Teams
- frontendeng
Front-end Engineering Team
- qaeng
QA Engineering Team
- devopseng
DevOps Engineering Team
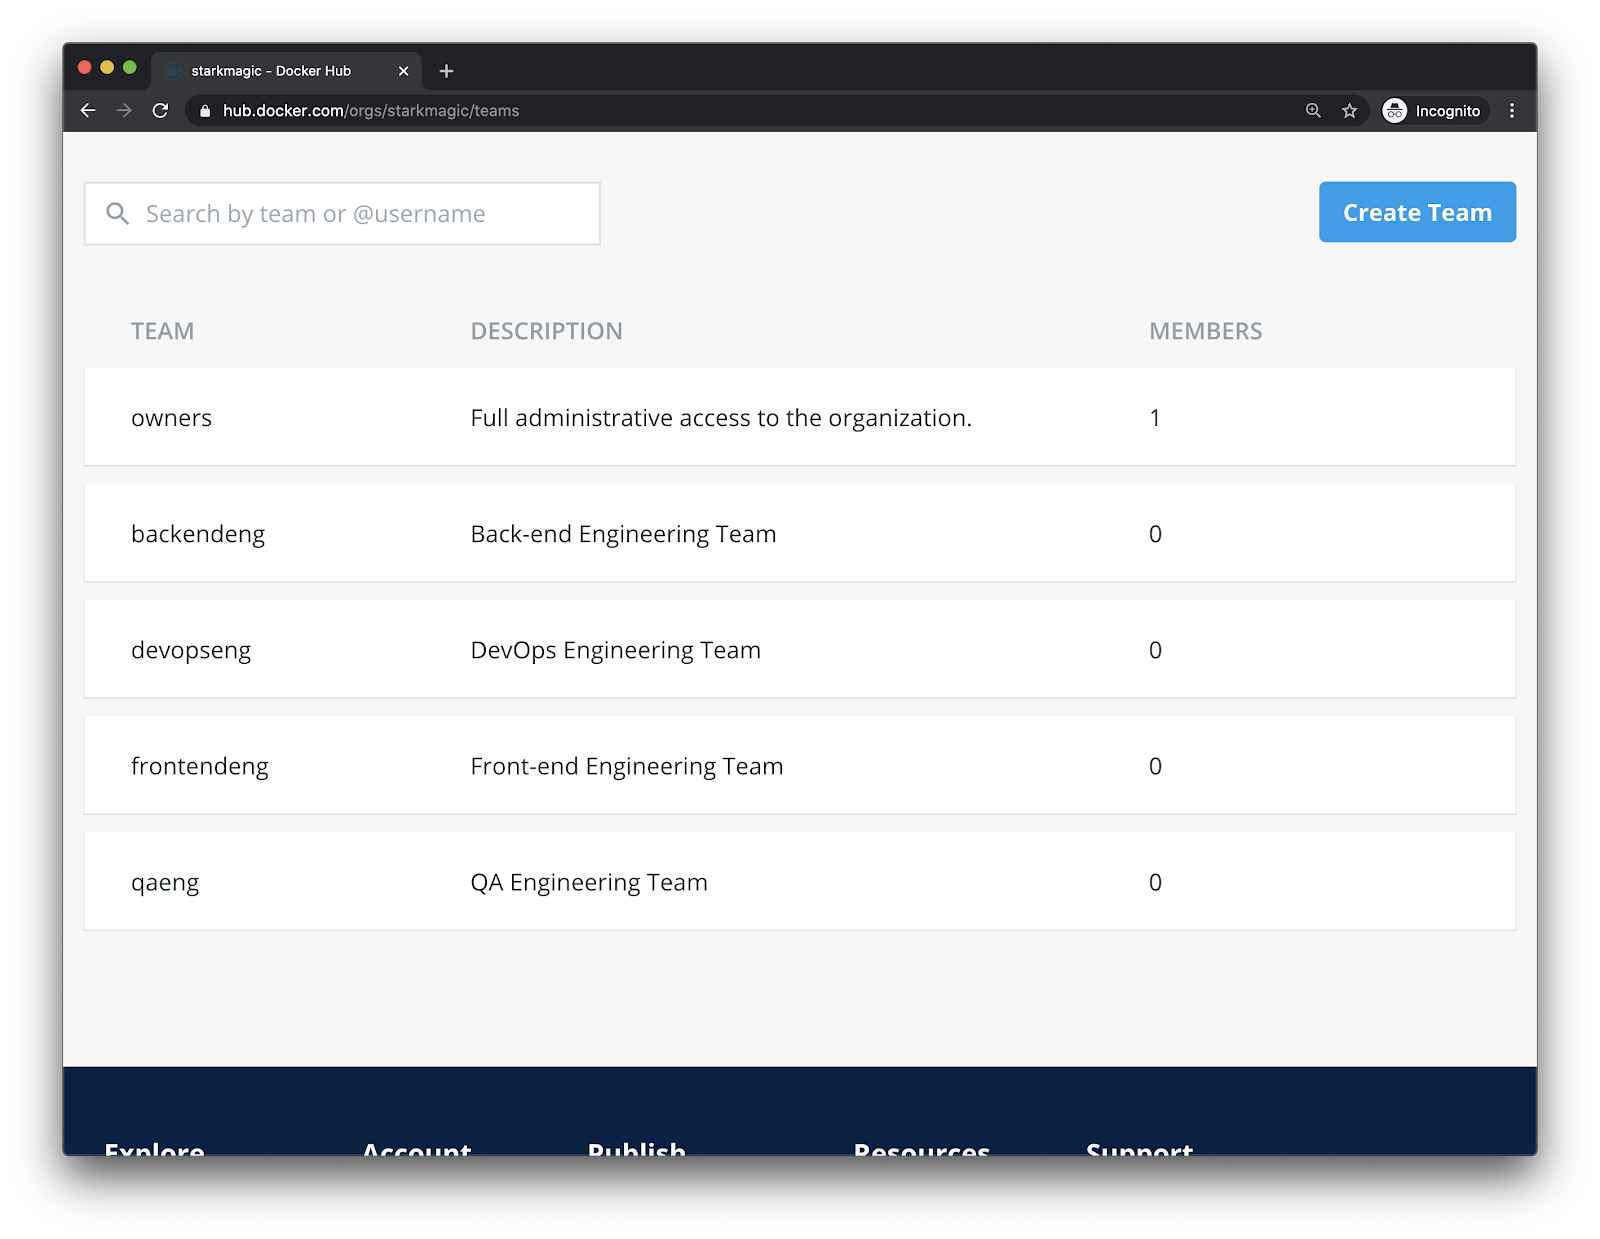
Now that we have our teams set up, let’s add users to each team.
Adding a user to a team is pretty straightforward. Select one of the teams from the list. Then click the blue “Add Member” button. Now, go ahead and enter the Docker ID of the user you want to add.
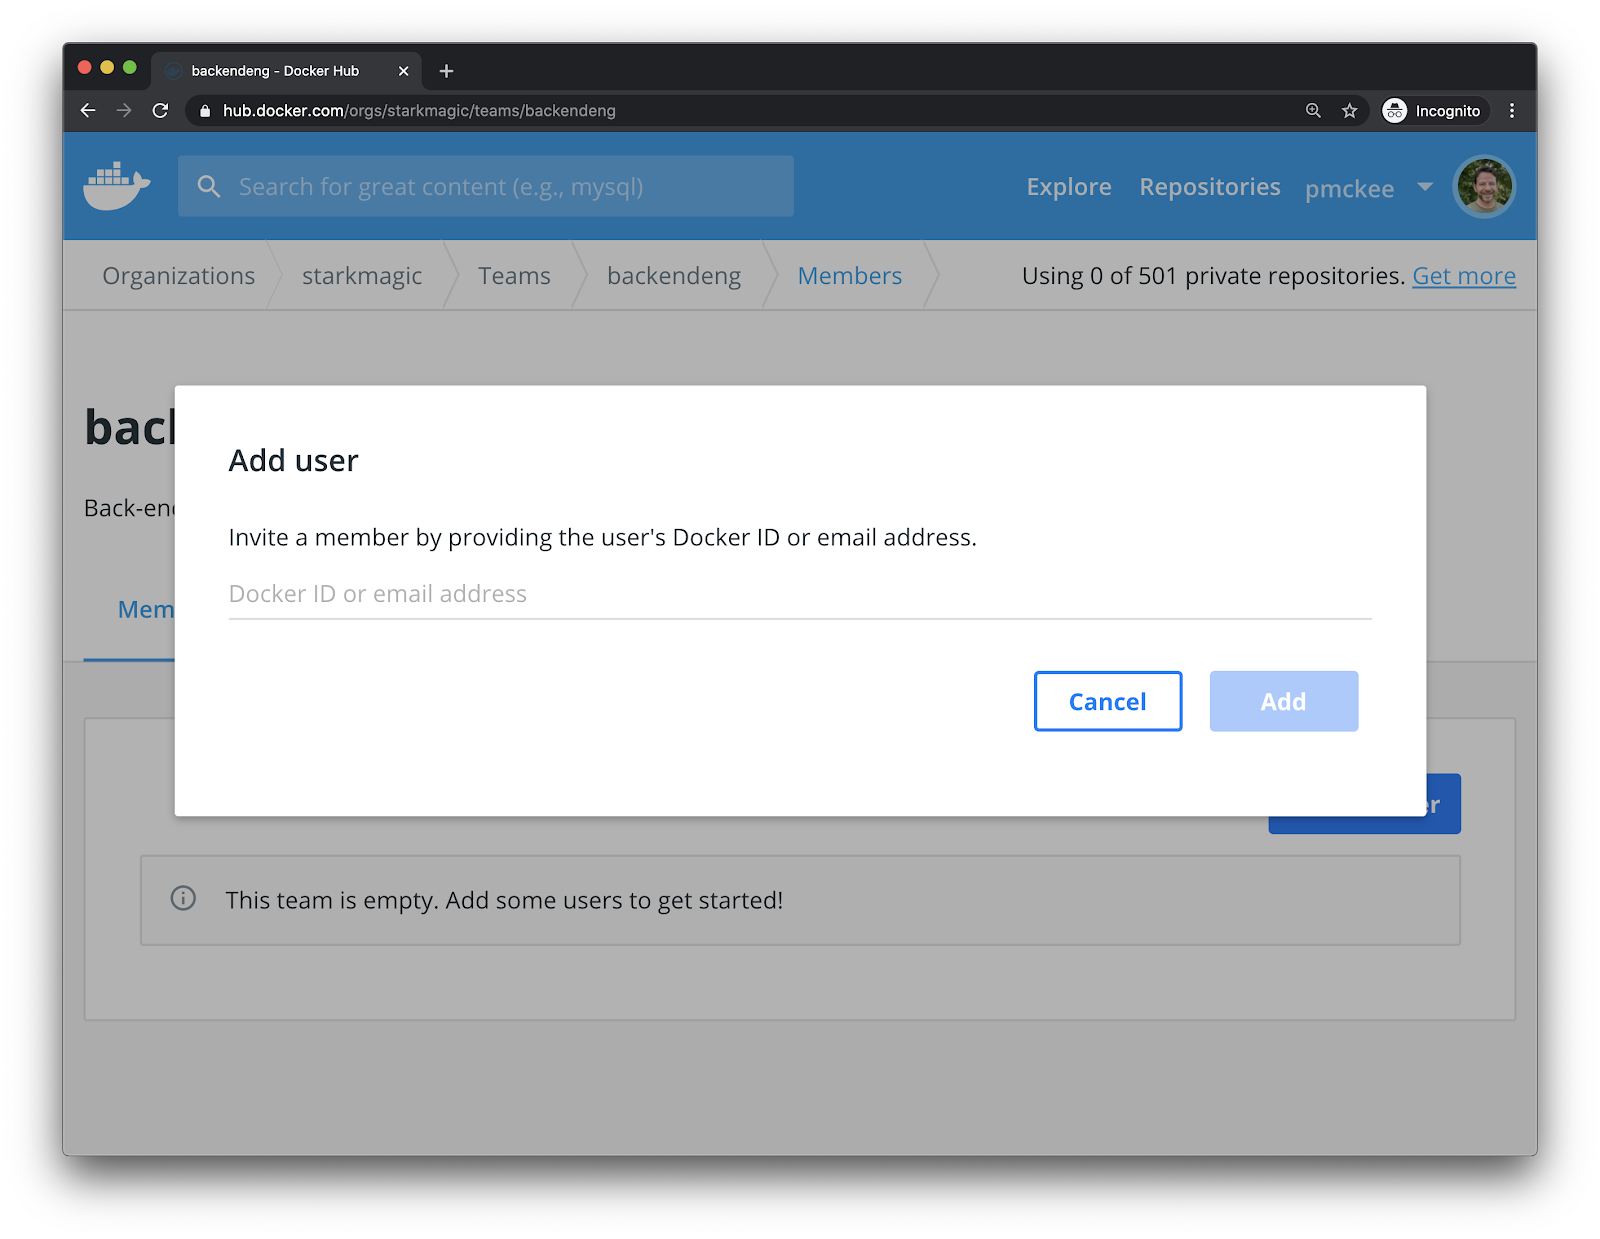
Go ahead and add at least one user to each of your teams.
Image Repository Permissions
Okay, now that we have our Organization and Teams set up. Let’s configure permissions for our image repositories.
Before we do that, let’s talk a little bit about workflow. We currently have two development teams that are writing code for our application. They work on feature creation and defect fixes. They also are responsible for writing the Dockerfiles that will be used by DevOps to build out the CI/CD pipeline.
Also, the development teams (front-end and back-end) should have Admin rights to the images they create. They will also have read permissions to the images that DevOps creates
Once a development team commits and pushes a change to the application, the CI/CD pipeline should kick off and build the images, run tests and push into our repository.
In this fictitious scenario, we do not have fully automated CI/CD into production because we want our QA team to test the application in our test environment and then approve the build. So, once the QA CI/CD pipeline has been run and pushed a build into the QA environment. QA will test and report defects. These defects will be tagged with the current image tag that the team is testing on. This way the development team can then pull and run that specific tag and reduce the complexity of reproducing the error.
Once the QA team has approved the build, they will then kick-off a CI/CD pipeline that will again build the image but this time, it will name and tag the image with a different image repository. One that is meant for a release. The QA team will have read and write access to this repository and the development teams will have read access.
The DevOps team will have Admin rights to all the image repositories that are in the CI/CD pipeline except the ones that are owned by the development teams. This way they have full control to set and manage the CI/CD pipeline.
Create Image Repos and Permissions
Let’s create the image repositories that our teams will use. We can also then set up the correct permissions for our teams.
Click the “Repositories” link in the top navigation. Then click the blue Create Repository button. Fill out the following form.
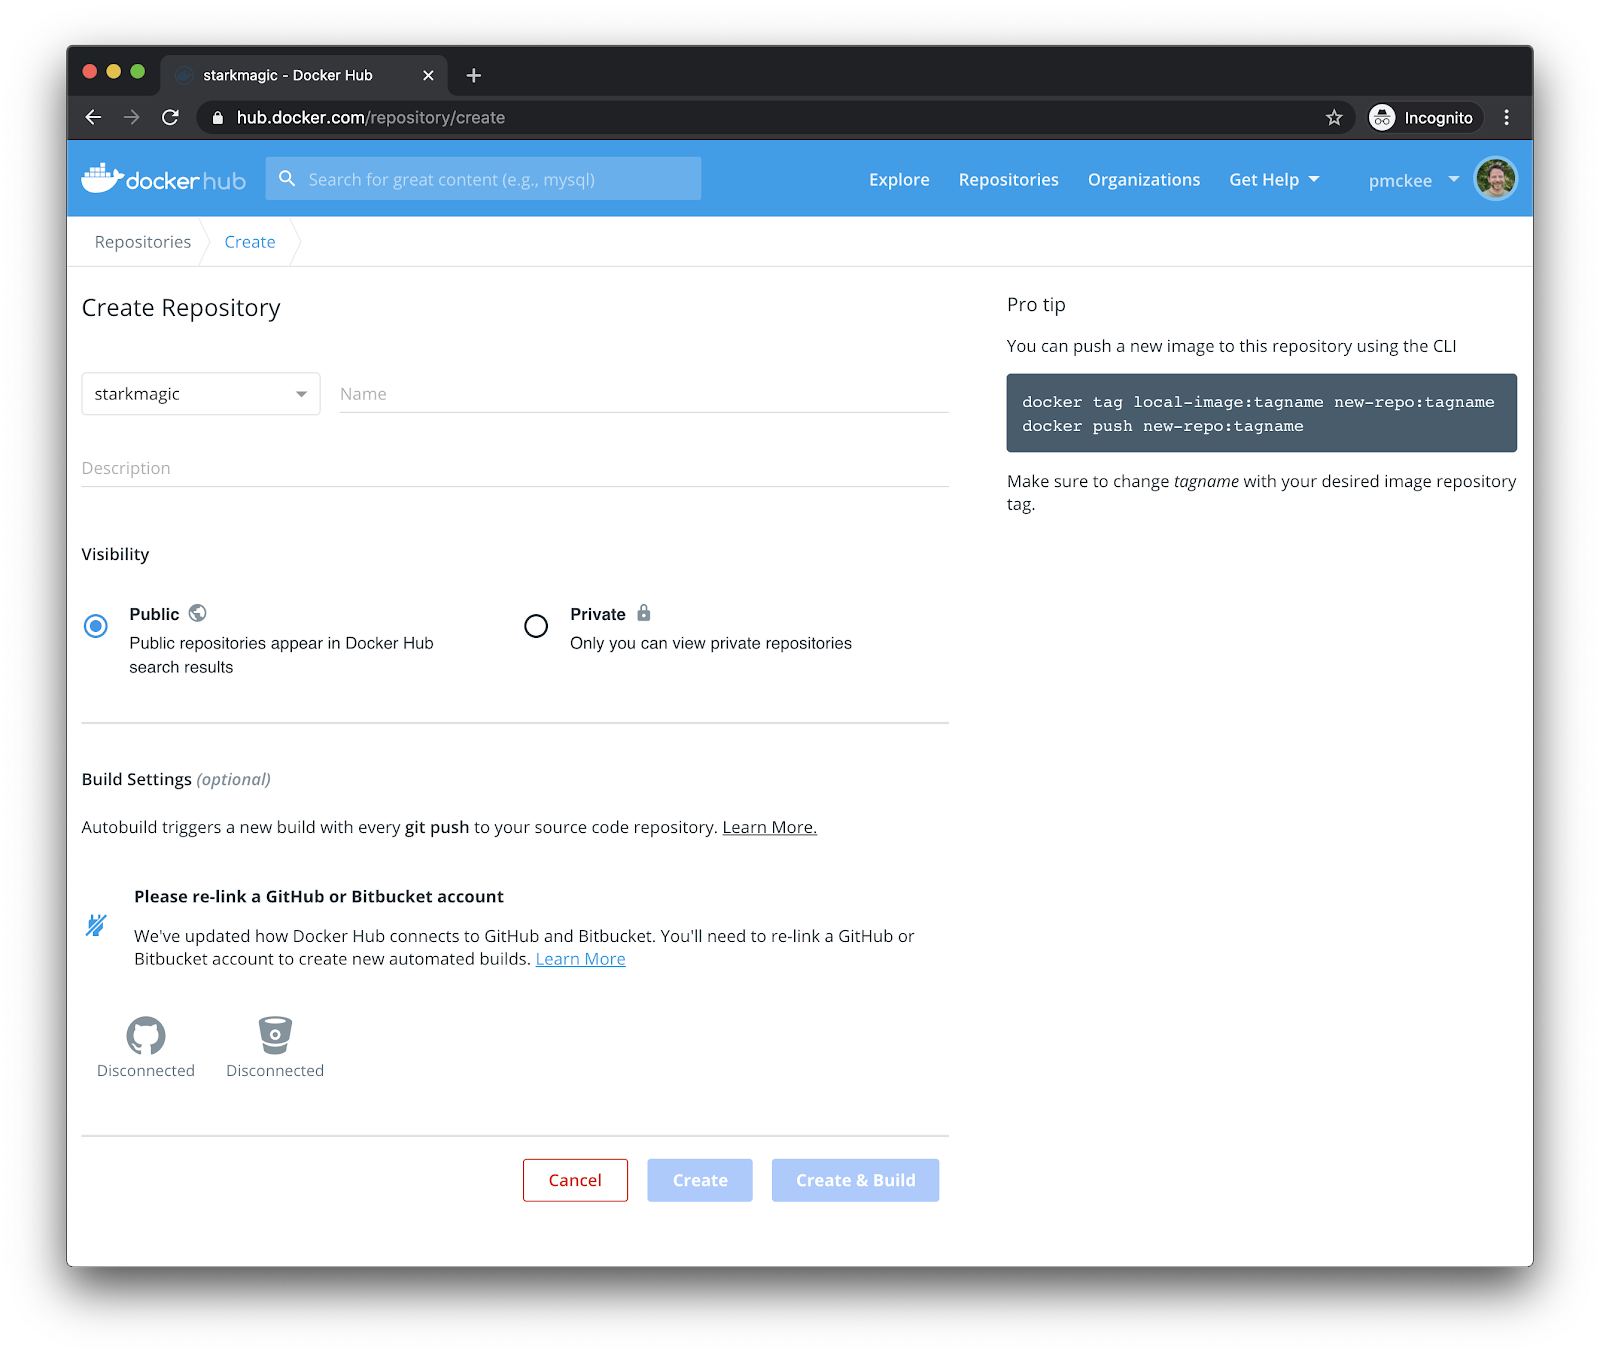
Choose your organization from the dropdown and then give your new image a name. Fill out the optional description and then choose Private. Once done, click the “Create” button.
You will need the following image repositories:
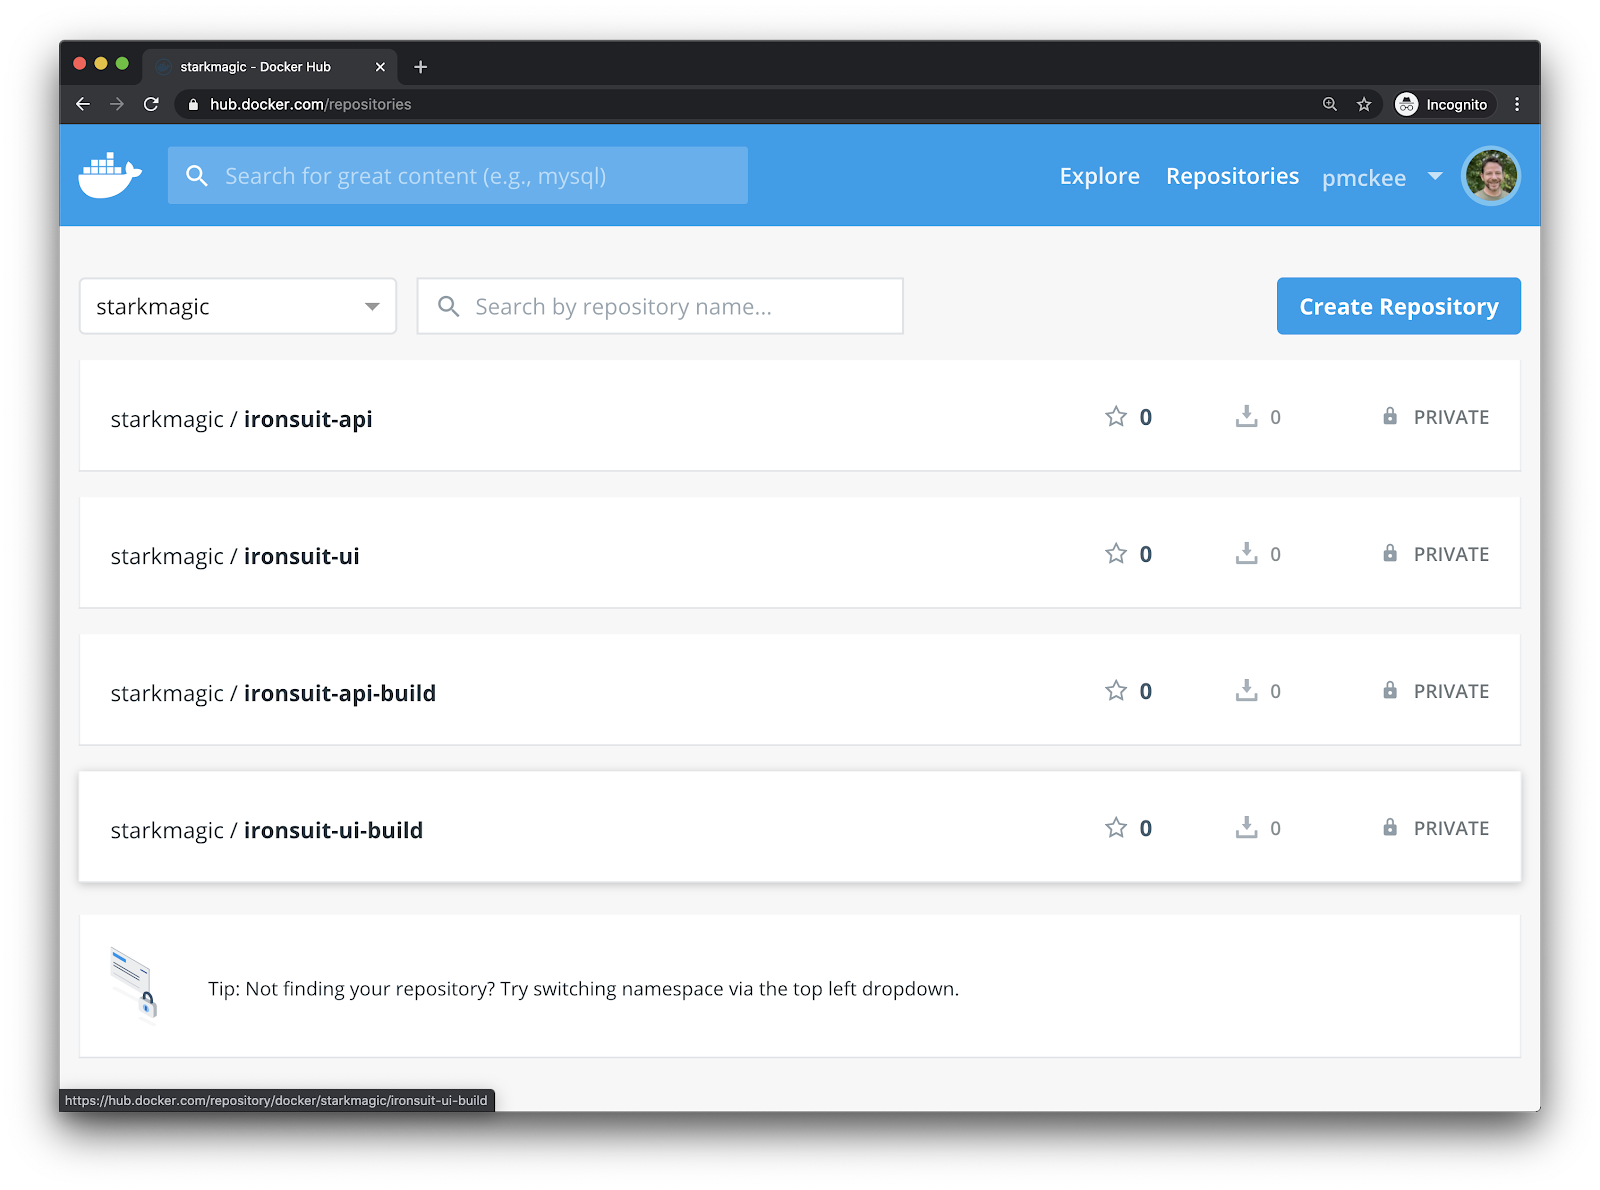
Now let’s assign permissions to our teams. Navigate to the Organization’s dashboard by clicking the “Organizations” link in the top navigation. Click the Organization that you want to manage. In our case, we’ll choose “starkmagic”. Now click the “Teams” tab.
Let’s start with the development teams. Click on the “frontendeng” Team to view it’s details. Then click the “Permissions” tab.
From the drop down menu, choose the “ironsuit-ui-build” repository and then choose “Admin” from the permissions dropdown.
You’ll notice that the description of the “Admin” privilege is displayed to the left of the UI.
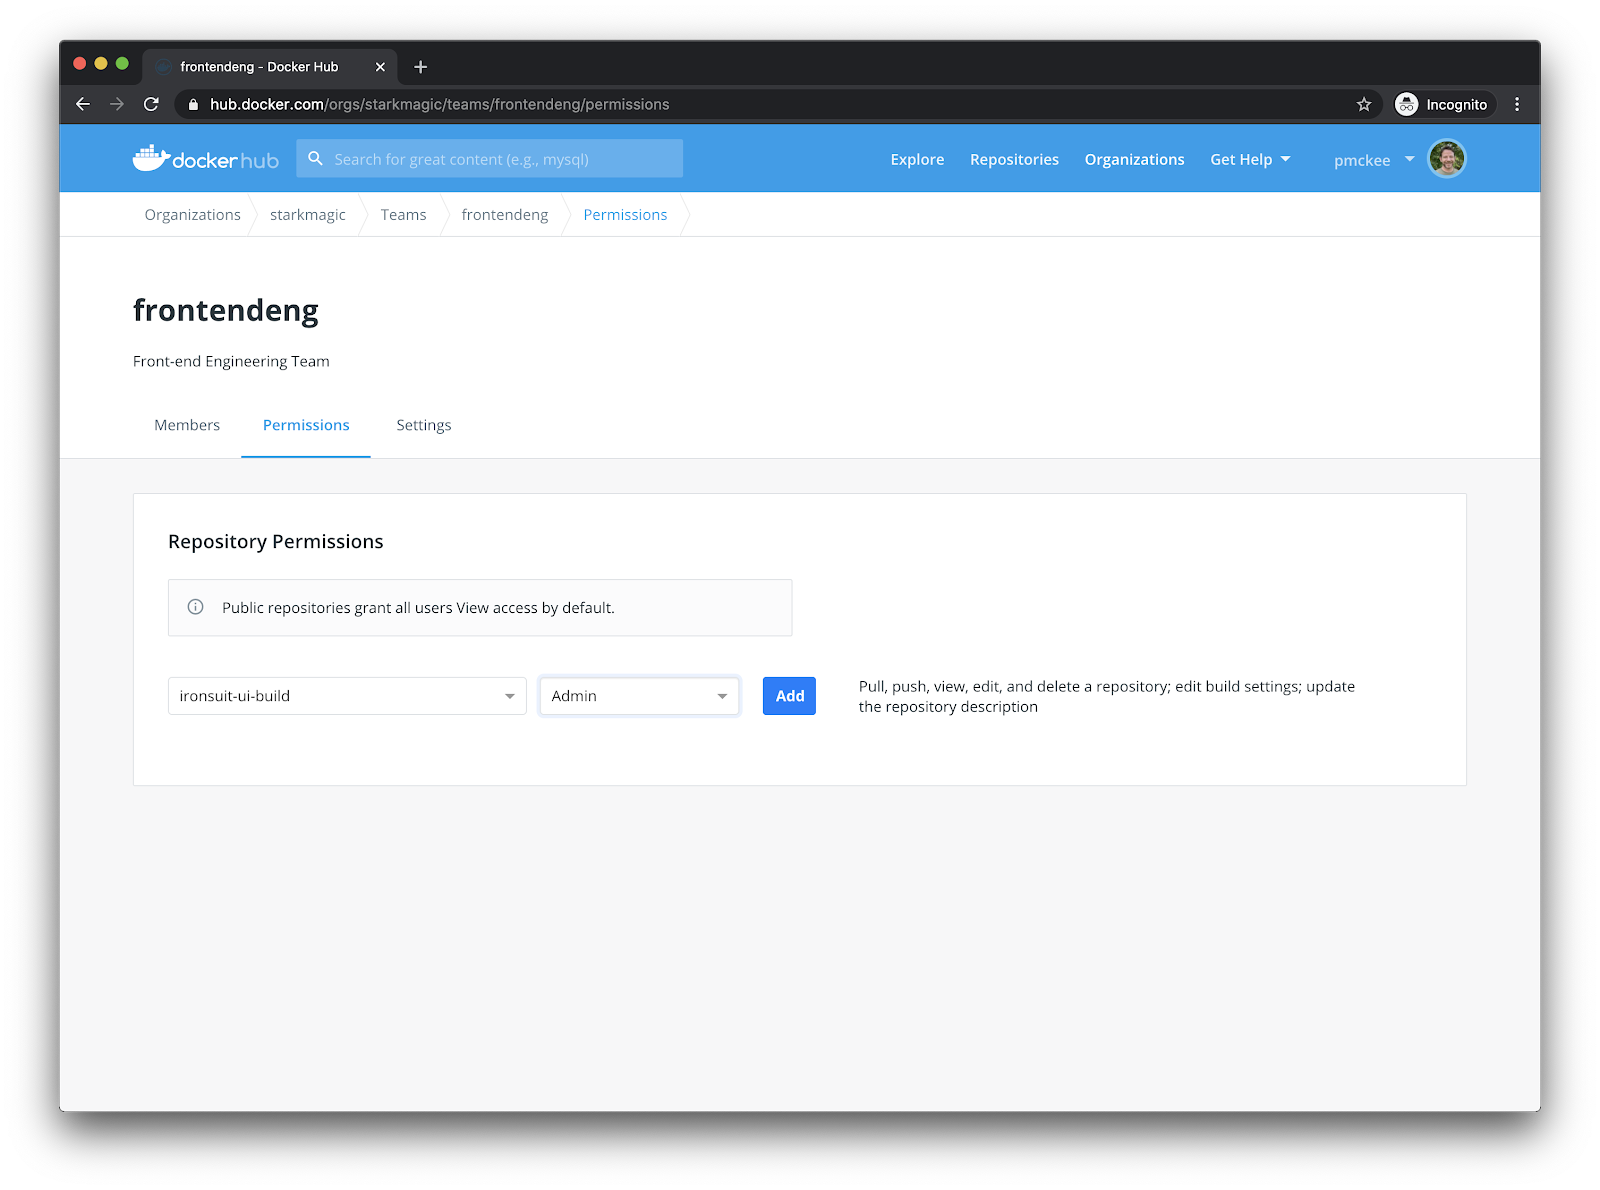
Click the blue “Add” button.
We also want to assign “read-only” permissions to the other three image repositories.
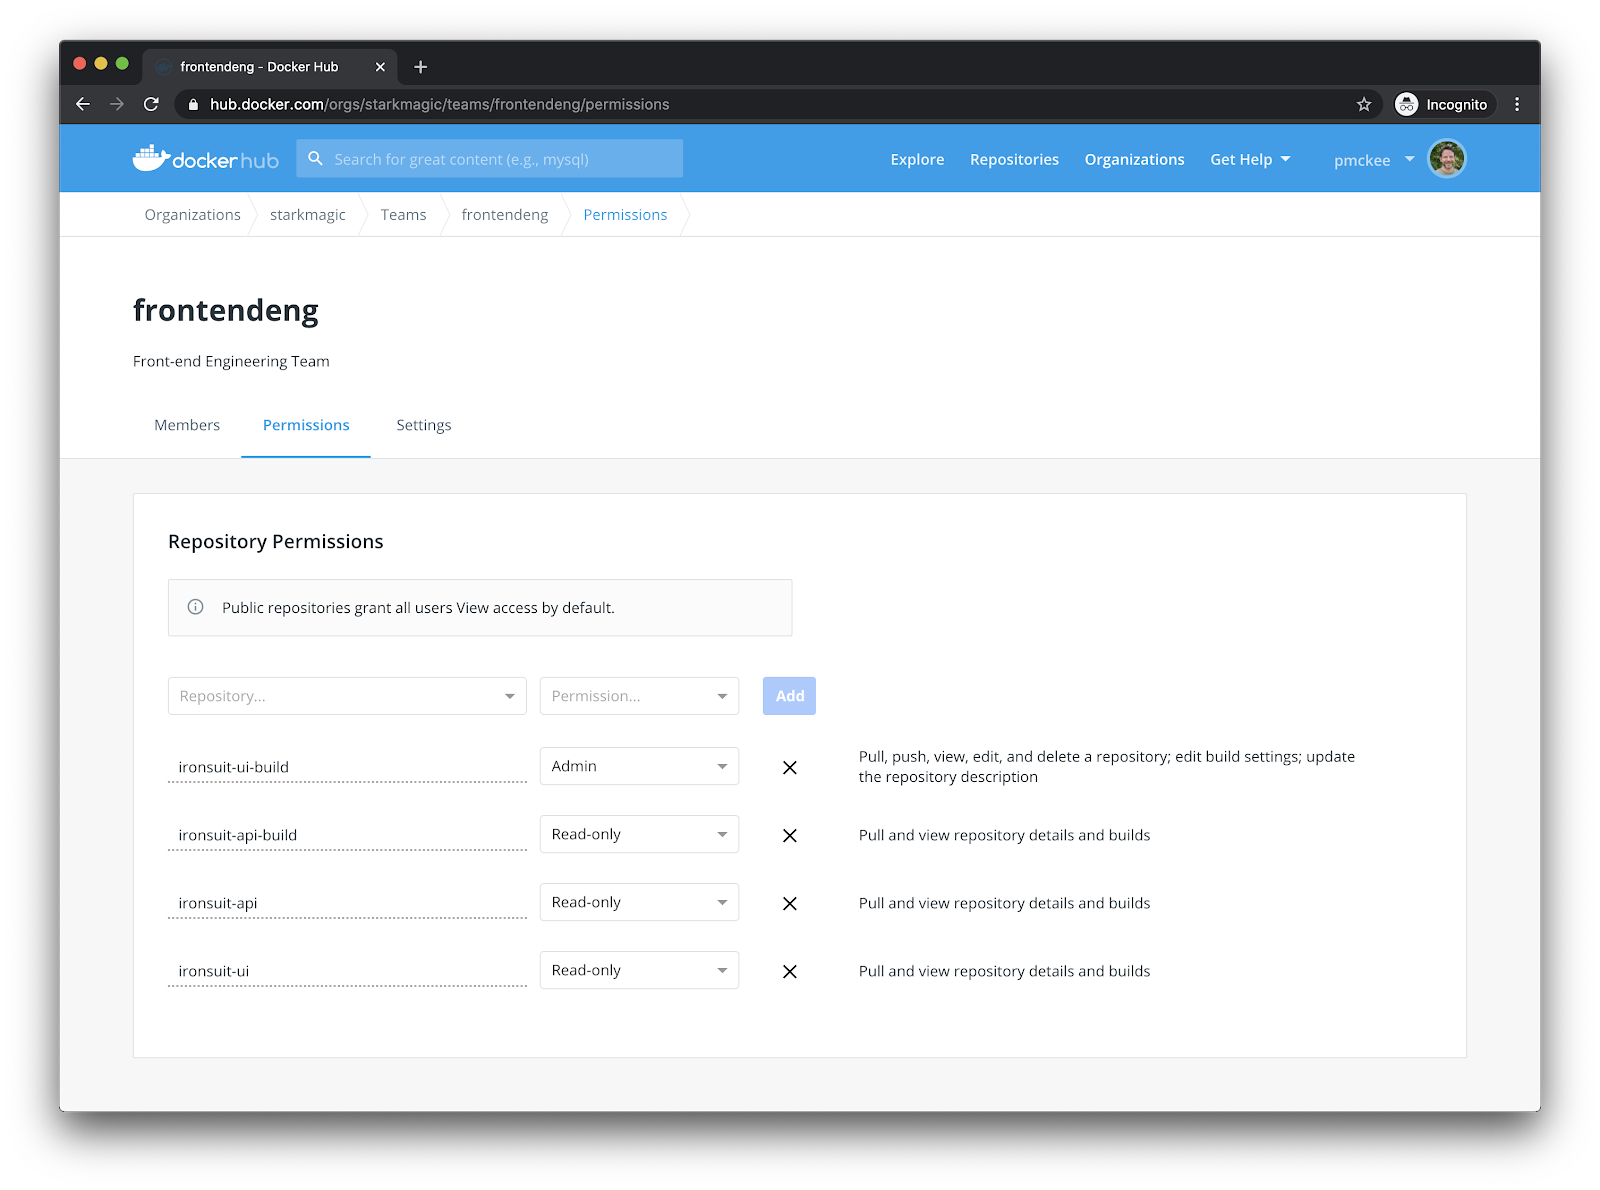
Now do the same for the backend engineering team. Assign the “backendeng” team “Admin” permissions to the “ironsuit-api-build” and “read-only” to the other three image repositories.
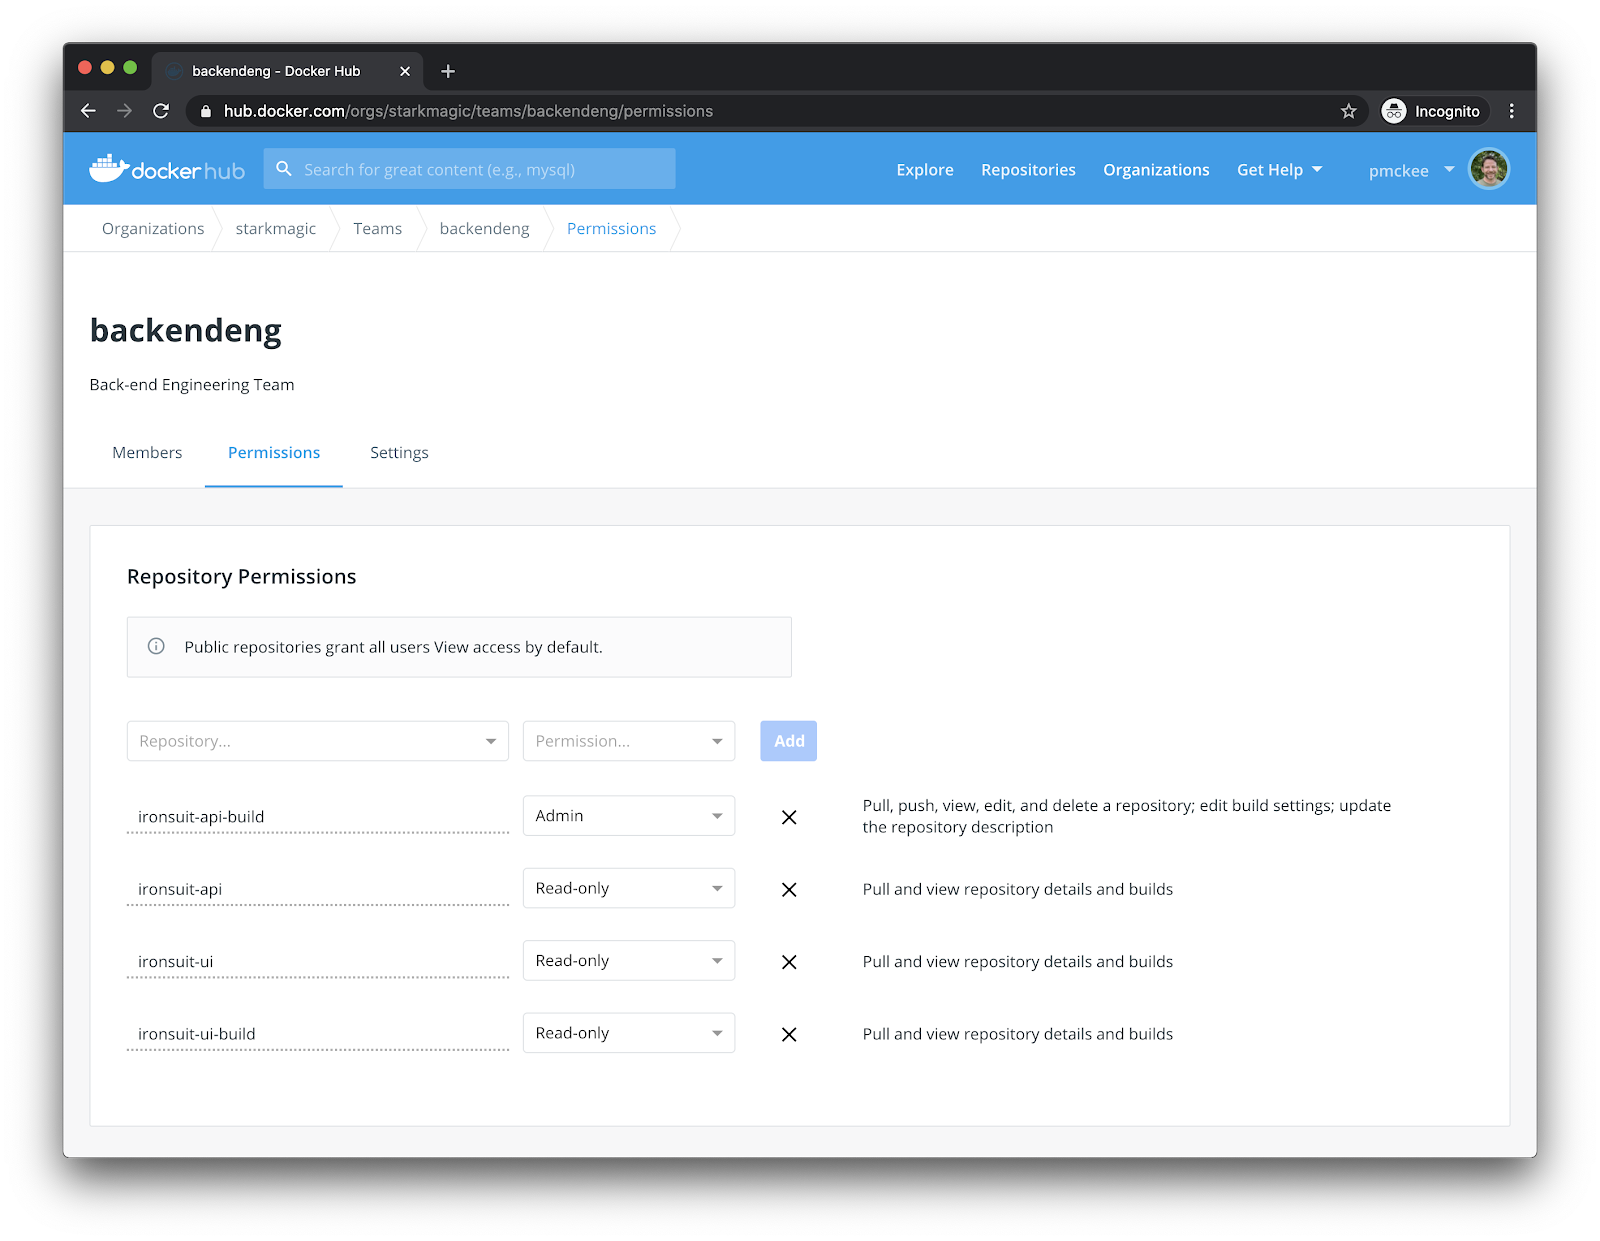
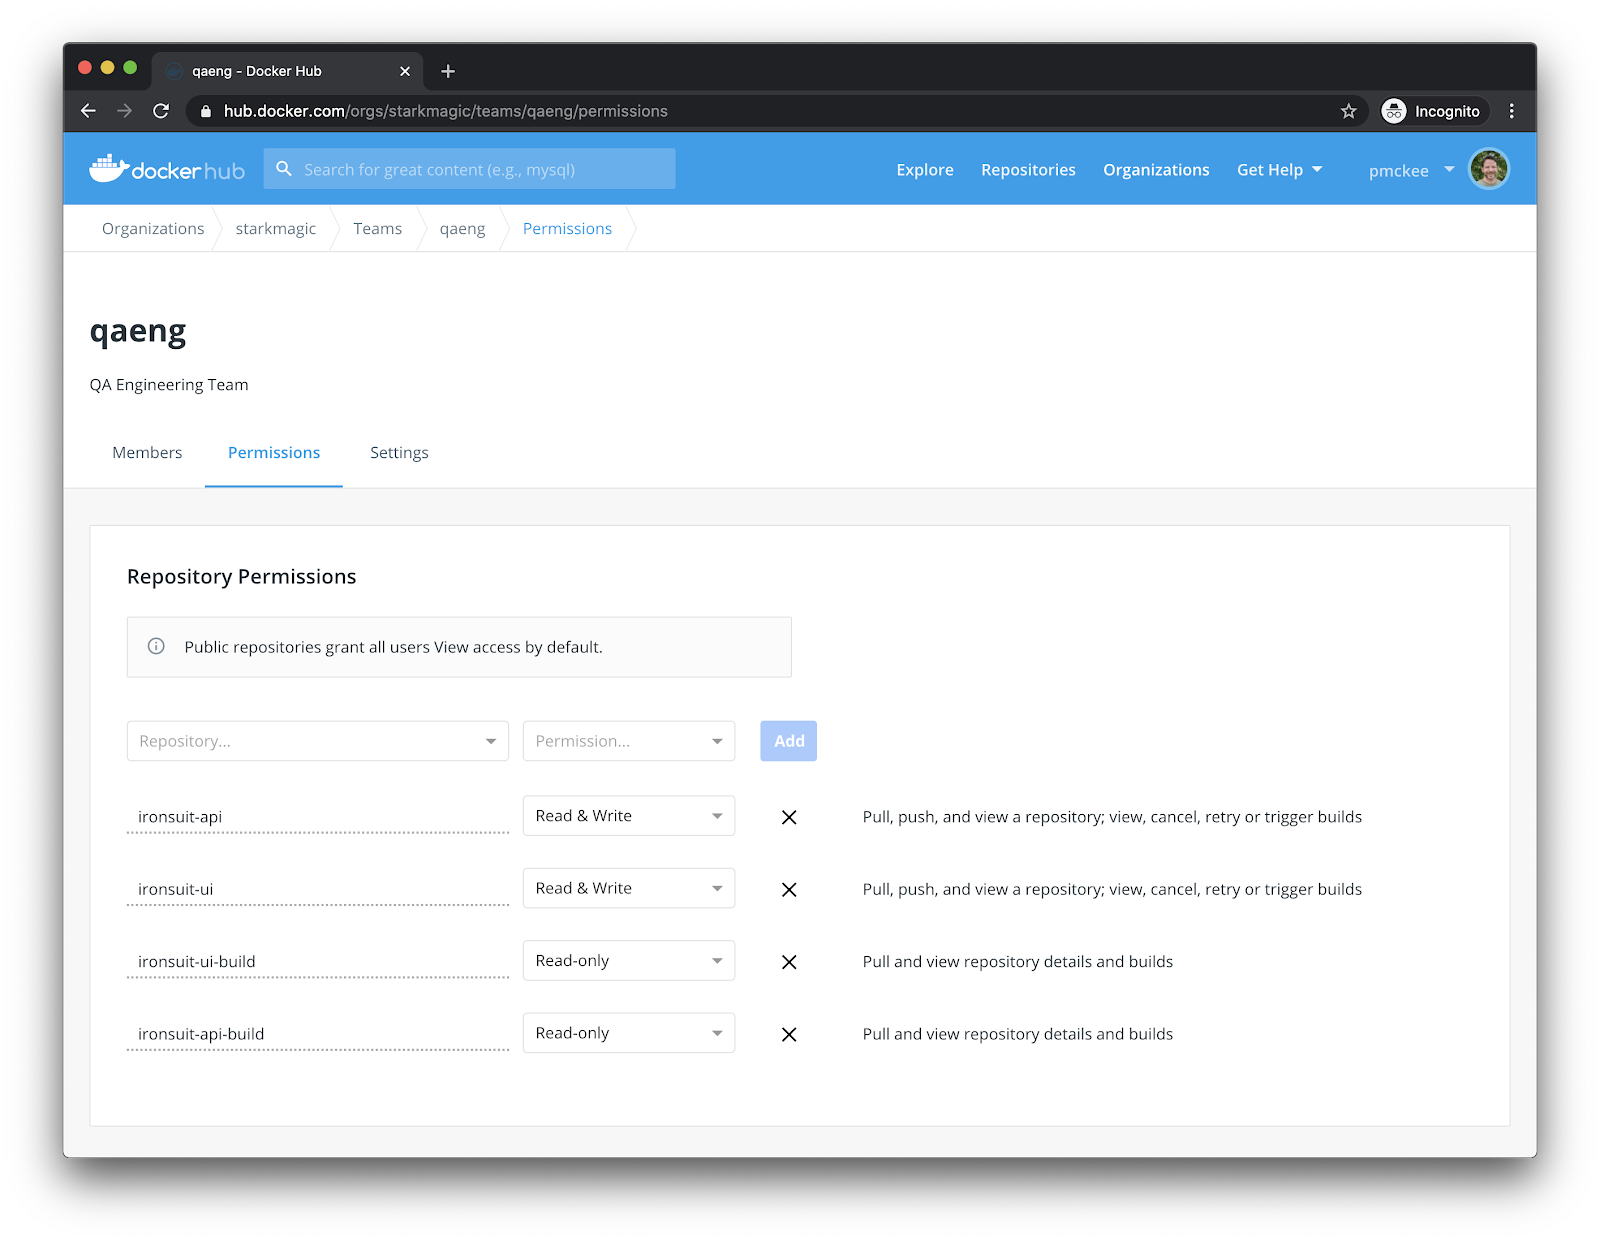
Now let’s set up permissions for the QA team.
Follow the same steps above to assign “Read & Write” permissions to the following image repositories:
- ironsuit-ui
- Ironsuit-api
Now assign “Read-only” permissions to the other images.
The final Team that we need to configure permissions for is the DevOps team. They will have “Admin” access to all images to allow the team to manage the full CI/CD pipeline.
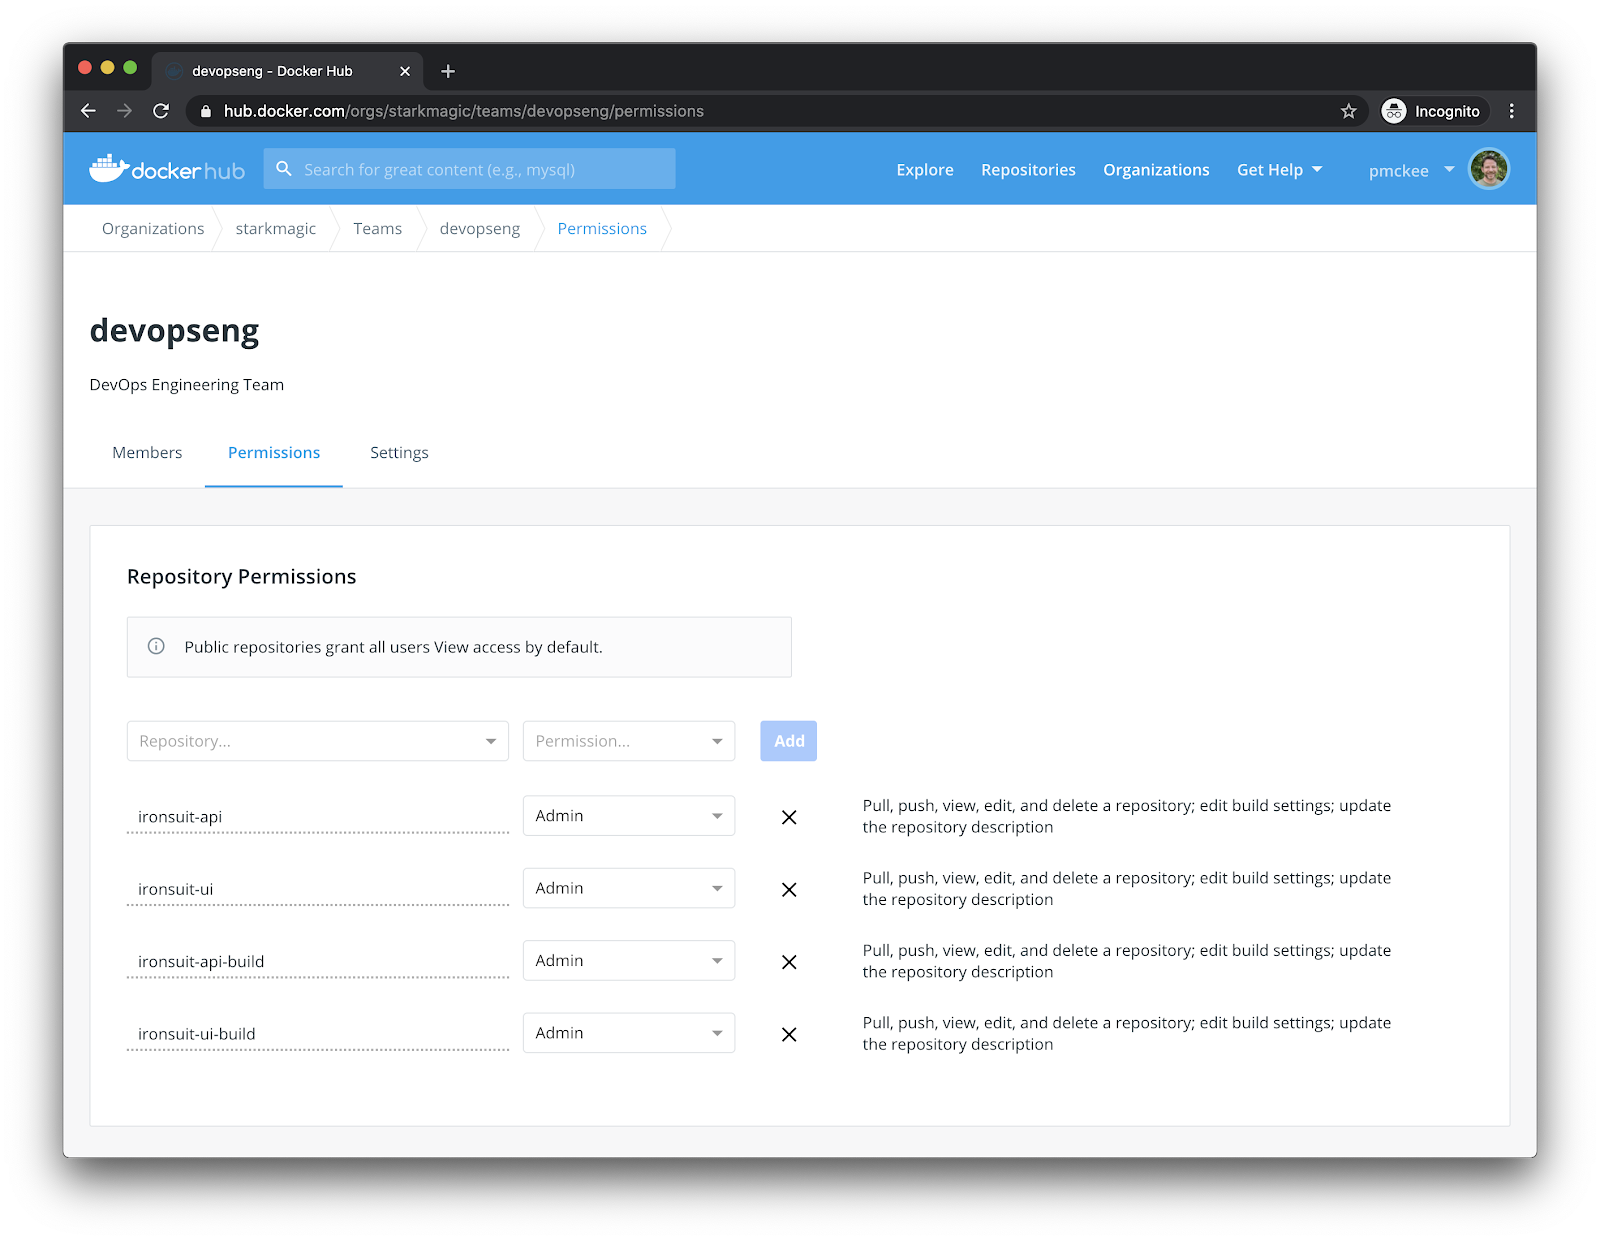
Follow the steps above to grant “Admin” permissions to all the images for the “devopseng” team.
Conclusion
Docker Hub has a simple yet extremely powerful Roles Based Access Control system to allow you to use Organizations and Teams to group and manager users permissions to image repositories. This allows distributed teams to own their own repos but collaborate across the organization and accelerate development workflow.
To learn more about Teams and Organizations checkout our documentation.


