The life of a game dev is tricky. You have so many ideas and tools at your disposal — but what you really want is to connect with your audience by building compelling gameplay. You’re itching to test ideas quickly, gather feedback, and grow as a developer. However, reaching your audience can be hard. First, everyone has their own machine with different operating systems. Second, programming languages have restrictions based on dependencies. Finally, exporting your game requires deep knowledge of building executables for different runtime environments. These obstacles make it difficult to reach potential gamers.
Docker Desktop can help you share your game faster with your audience. You can focus on creating a great game, while Docker Desktop helps streamline the distribution process. In this guide, we’ll tackle how to deploy an HTML5 game and connect with gamers faster.
Overview
We’ll cover the basics behind exporting your game, creating a Docker image, instantiating a container from that image, and finally serving your game within that container. Your web game will then be playable, and you’ll be able to control your server via Docker.
What You’ll Need
-
- Your game code (to help you get started, you can quickly fork this 2D Platformer Demo for purposes of this blog post)
- The latest version of Docker Desktop
- The Godot game engine, which supports all major platforms
Each of these pieces enables you to develop your HTML5 game. Docker Desktop and Godot together provide integrated sets of developer tools that help streamline development — without requiring deep technical expertise. Let’s dive in.
Getting Started
The most important piece of technology in this process is your game. This is what you’ll want to share and update as feedback rolls in. For our example, we’ll use an HTML5 game built atop Godot. Godot is a rich, open-source game development engine known for its user-friendly, visual interface.
Godot also makes exporting your game into HTML5 very easy. However, figuring out how to deploy, configure, and manage your HTML5 game server can be a time-consuming process. Docker helps you properly configure your server while promoting strong security. Kick off the process with these three steps:
1) Download Godot
Godot is self-contained and does not require installation. However, you will need to download it. Godot comes in one universal, 64-bit flavor that’s compatible with x86 and Apple Silicon. You’ll only have to choose between standard and mono versions — the latter of which offers C# support.
Extract your compressed Godot application into a new directory once the download is complete. Within that newly created directory, you’ll see the Godot application. Once started, Godot will create a project for your game and help you develop your code. In this upcoming example, I’ll import a game demo from the Godot Asset Library as a stand-in for your game (2D Platformer Demo).
2) Export Your Game in Godot
Let’s begin by exporting your completed game after development is finished. Click Project→Export to summon the dialog below:

If you don’t see HTML5 as an option, you can quickly add it by clicking the Add button at the top. Next, click the Export Project button once HTML5 is available. In the next window, save your game as index.html in a new directory and uncheck the debug checkbox. You’re then ready to close Godot.
3) Install Docker Desktop
Download and install the latest version of Docker Desktop. Choose the version matching your workstation OS — and remember to choose either the Intel or Apple (M-series) processor variant if you’re running macOS.

Creating Your Docker Image
Once you’ve installed Docker Desktop, navigate to your exported HTML5 game’s directory. Next, create an empty file called Dockerfile within that directory. The Dockerfile will contain the instructions needed to create your Docker image. Paste the following code into your Dockerfile:
1 2 | FROM nginx COPY . /usr/share/nginx/html |
The first line tells Docker to build the image by starting with NGINX. The second line copies the files from your current directory to the HTML directory in NGINX. Save your file. Next, open the console from the current directory and paste in the following code:
docker build -t robo .
Docker will then build the image by using the current directory’s Dockerfile. The command will also tag this image as robo. However, it’s often helpful to tag your game file with something contextually relevant to your game. To view your newly created image details, enter the following command:
docker images
Finally, copy your recently-created image id from the output of the above command. You’ll need it for these next steps.
Running Your HTML5 Game
Once your image is created, you only need to start your game container. There are two ways to accomplish this.
Method 1: Using Docker Desktop
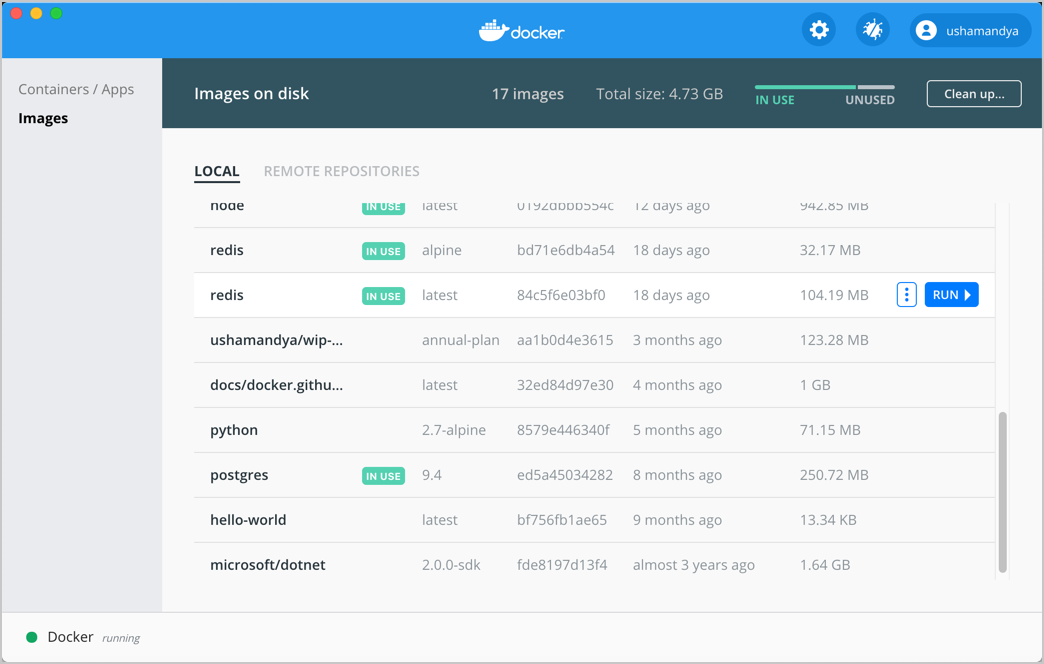
First, you can hop into Docker Desktop and leverage the Dashboard to spin up your container. Since we have a working image already, navigate to the Images view from the sidebar. This summons a list of your existing images — and namely displays your earlier image with its corresponding ID. While your view will be a little different, here’s how that interface will look:

Hover over your robo tagged image, and then click the blue Run button that appears. Docker Desktop will prompt you to click the Optional Settings drop down. Take this opportunity to choose a name and the port that your game should run on. For this example, let’s specify port 80. Your image will then run as a container on port 80, which is accessible through your browser.
Shutting this active image down is equally easy. Since your image is now running as a container, navigate to the Container/Apps view from the sidebar. Locate your running container, hover over it with your cursor, and click the square Stop button that appears:

Again, this container name will instead match the name that you’ve chosen during this walkthrough.
Method 2: Using the CLI
Alternatively, should you want to manually start things up, enter the following command:
docker run -d -p 80:80 robo
In place of the generic [image id], substitute in the image id or tag (used above) that you copied earlier. The above command tells Docker to run your image in the background as a container on port 80.
Whether you’ve used the Dashboard or the CLI, jump into your web browser and paste in this URL to confirm that everything works:
http://localhost
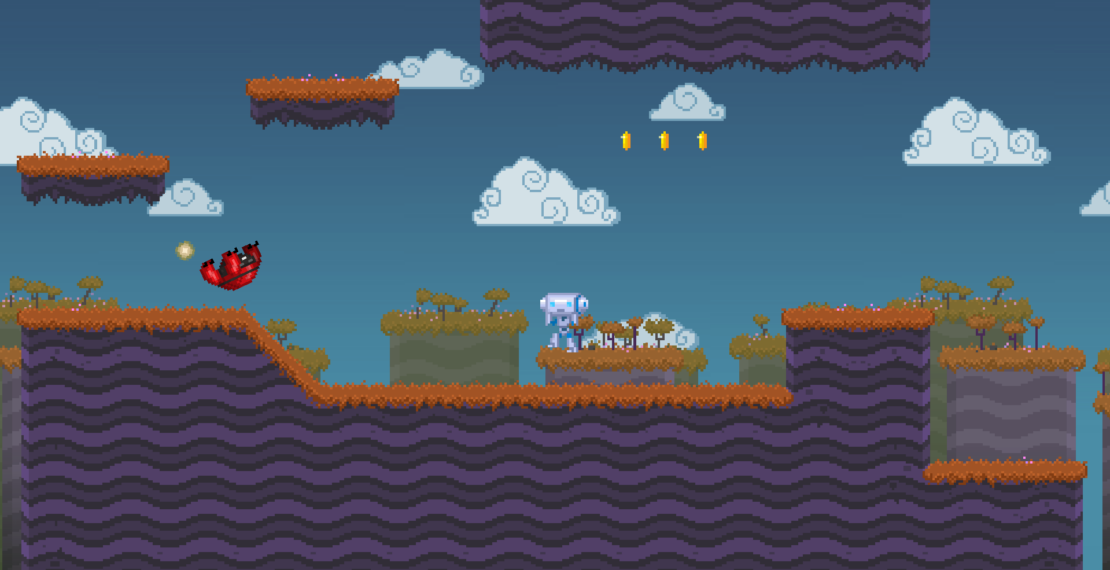
You should see your game running as in the photo below:

Next, enter the following command:
docker ps
This command reveals details about your containers. You can copy your container id and enter the following to shut down your container:
docker stop [container id]
This is a perfectly good way to manage your game container. However, we recommend setting a name to avoid needing the docker ps command, since this adds an extra step to the process. Familiarizing yourself with both processes can be helpful for future builds.
Finally, you can restart your container by simply typing docker start [container id].
Wrapping Up
Downloading and configuring a game server doesn’t have to be difficult. Docker Desktop helps you manage your HTML5 game’s backend without friction. You can tackle many essential processes with a couple of simple console commands. All that’s left to do is share your game and grow as a developer — and deliver entertainment to wider audiences.
Be sure to check out Docker Hub to view more Docker Official Images. Our example used NGINX, but you could try many different web servers for your project. Additionally, Docker Hub hosts numerous images that cater to more than just web servers.
Hungry for more game development? If you want to know more about quickly deploying Minecraft cloud servers, check out Guillaume Tardif’s detailed walkthrough.
Register for DockerCon 2022!
Our agenda for DockerCon 2022 is packed with value — whether you’re a game developer or someone who enjoys experimenting with top programming languages. You’re invited to this immersive, virtual experience filled with workshops, deep-learning opportunities, community engagement — and even a special appearance from Brian Jackson, Senior Engineering Manager at Lucasfilm’s ILMxLAB entertainment studio!
Brian and his team have launched titles like Star Wars: Tales from the Galaxy’s Edge and Vader Immortal. Join us during our keynote to learn how ILMxLAB has reduced many complexities behind widespread game distribution.
DockerCon 2022 is fast approaching. Register for free to enjoy these exciting talks and much, much more as we dive deeply into today’s leading technologies. Don’t miss it!
