The AtSea Shop is an example storefront application that can be deployed on different operating systems and can be customized to both your enterprise development and operational environments. In my last post, I discussed the architecture of the app. In this post, I will cover how to setup your development environment to debug the Java REST backend that runs in a container.
Building the REST Application
I used the Spring Boot framework to rapidly develop the REST backend that manages products, customers and orders tables used in the AtSea Shop. The application takes advantage of Spring Boot’s built-in application server, support for REST interfaces and ability to define multiple data sources. Because it was written in Java, it is agnostic to the base operating system and runs in either Windows or Linux containers. This allows developers to build against a heterogenous architecture.
Project setup
The AtSea project uses multi-stage builds, a new Docker feature, which allows me to use multiple images to build a single Docker image that includes all the components needed for the application. The multi-stage build uses a Maven container to build the the application jar file. The jar file is then copied to a Java Development Kit image. This makes for a more compact and efficient image because the Maven is not included with the application. Similarly, the React store front client is built in a Node image and the compile application is also added to the final application image.
I used Eclipse to write the AtSea app. If you want info on configuring IntelliJ or Netbeans for remote debugging, you can check out the the Docker Labs Repository. You can also check out the code in the AtSea app github repository.
I built the application by cloning the repository and imported the project into Eclipse by setting the Root Directory to the project and clicking Finish
File > Import > Maven > Existing Maven Projects
Since I used using Spring Boot, I took advantage of spring-devtools to do remote debugging in the application. I had to add the Spring Boot-devtools dependency to the pom.xml file.
<dependency>
     <groupId>org.springframework.boot</groupId>
     <artifactId>spring-boot-devtools</artifactId>
</dependency>
Note that developer tools are automatically disabled when the application is fully packaged as a jar. To ensure that devtools are available during development, I set the <excludeDevtools> configuration to false in the spring-boot-maven build plugin:
<build>
    <plugins>
        <plugin>
            <groupId>org.springframework.boot</groupId>
            <artifactId>spring-boot-maven-plugin</artifactId>
            <configuration>
                <excludeDevtools>false</excludeDevtools>
            </configuration>
        </plugin>
    </plugins>
</build>
This example uses a Docker Compose file that creates a simplified build of the containers specifically needed for development and debugging.
 version: "3.1"

services:
  database:
    build:
       context: ./database
    image: atsea_db
    environment:
      POSTGRES_USER: gordonuser
      POSTGRES_DB: atsea
    ports:
      - "5432:5432"
    networks:
      - back-tier
    secrets:
      - postgres_password

  appserver:
    build:
       context: .
       dockerfile: app/Dockerfile-dev
    image: atsea_app
    ports:
      - "8080:8080"
      - "5005:5005"
    networks:
      - front-tier
      - back-tier
    secrets:
      - postgres_password

secrets:
  postgres_password:
    file: ./devsecrets/postgres_password

networks:
  front-tier:
  back-tier:
  payment:
    driver: overlay
The Compose file uses secrets to provision passwords and other sensitive information such as certificates – without relying on environmental variables. Although the example uses PostgreSQL, the application can use secrets to connect to any database defined by as a Spring Boot datasource. From JpaConfiguration.java:
 public DataSourceProperties dataSourceProperties() {
        DataSourceProperties dataSourceProperties = new DataSourceProperties();

    // Set password to connect to database using Docker secrets.
    try(BufferedReader br = new BufferedReader(new FileReader("/run/secrets/postgres_password"))) {
        StringBuilder sb = new StringBuilder();
        String line = br.readLine();
        while (line != null) {
            sb.append(line);
            sb.append(System.lineSeparator());
            line = br.readLine();
        }
         dataSourceProperties.setDataPassword(sb.toString());
     } catch (IOException e) {
        System.err.println("Could not successfully load DB password file");
     }
    return dataSourceProperties;
}
Also note that the appserver opens port 5005 for remote debugging and that build calls the Dockerfile-dev file to build a container that has remote debugging turned on. This is set in the Entrypoint which specifies transport and address for the debugger.
ENTRYPOINT ["java",

"-agentlib:jdwp=transport=dt_socket,server=y,suspend=y,address=5005","-jar",

"/app/AtSea-0.0.1-SNAPSHOT.jar"]
Remote Debugging
To start remote debugging on the application, run compose using the docker-compose-dev.yml file.
docker-compose -f docker-compose-dev.yml up --build
Docker will build the images and start the AtSea Shop database and appserver containers. However, the application will not fully load until Eclipse’s remote debugger attaches to the application. To start remote debugging you click on Run > Debug Configurations …
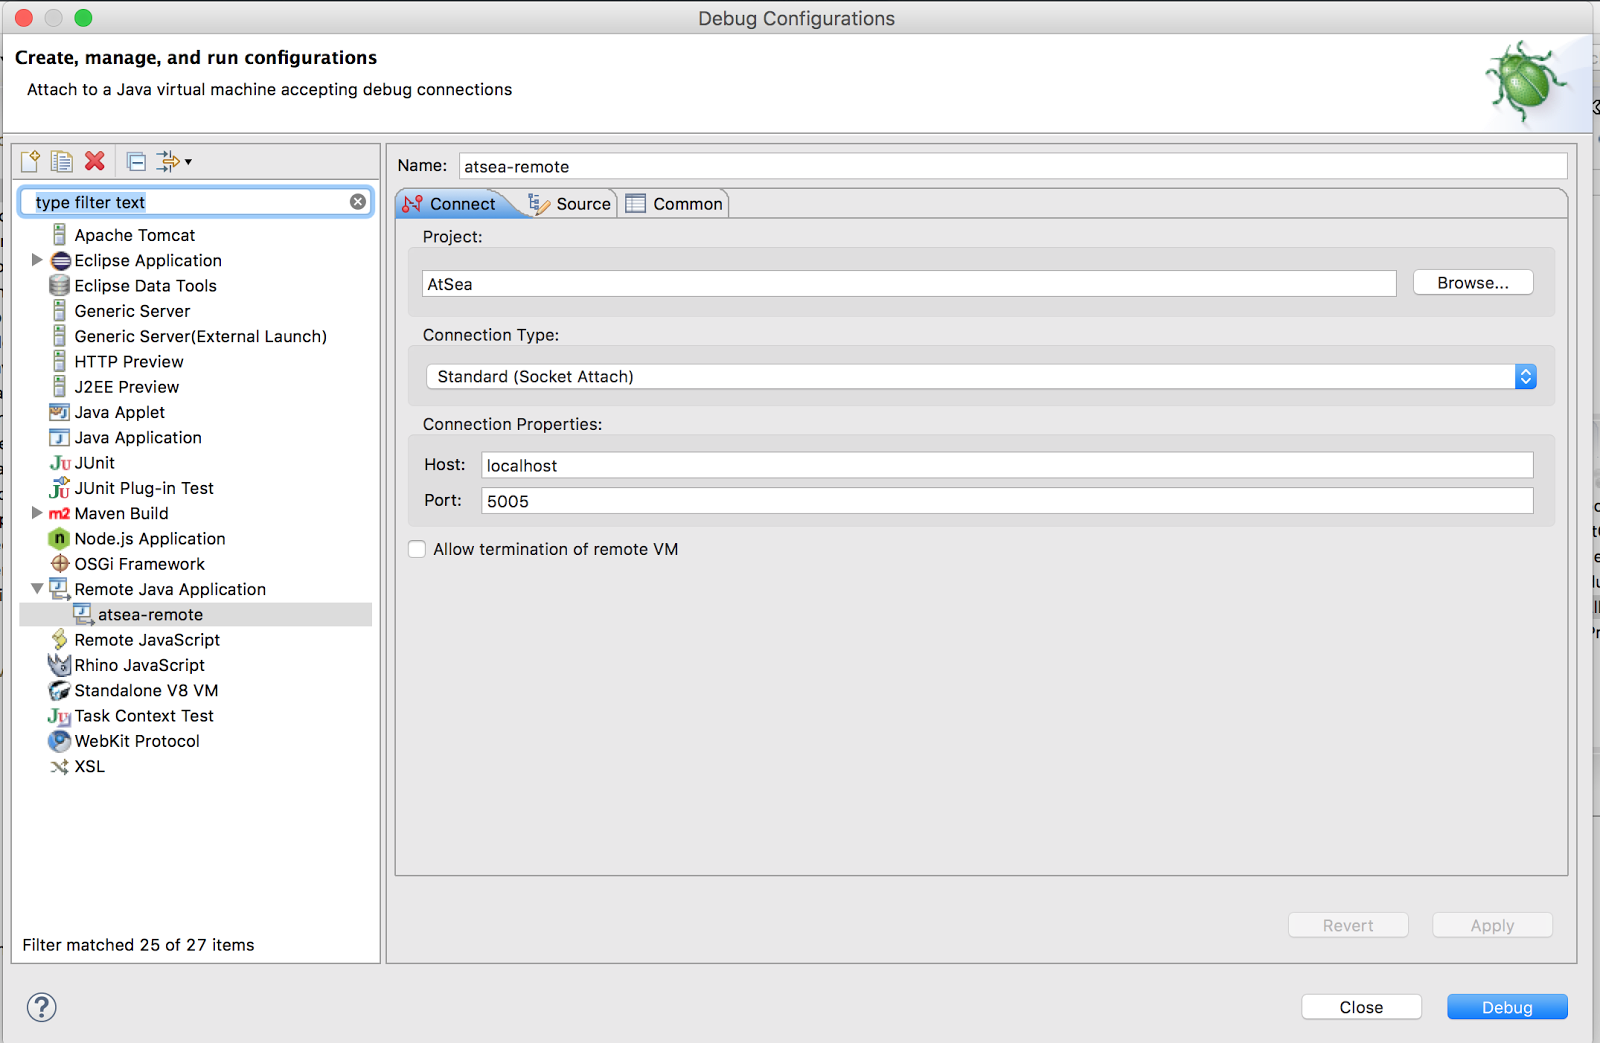
Select Remote Java Application then press the new button to create a configuration. In the Debug Configurations panel, you give the configuration a name, select the AtSea project and set the connection properties for host and the port to 5005. Click Apply > Debug.

The appserver will start up.
appserver_1|2017-05-09 03:22:23.095 INFO 1 --- [main] s.b.c.e.t.TomcatEmbeddedServletContainer : Tomcat started on port(s): 8080 (http)

appserver_1|2017-05-09 03:22:23.118 INFO 1 --- [main] com.docker.atsea.AtSeaApp                : Started AtSeaApp in 38.923 seconds (JVM running for 109.984)
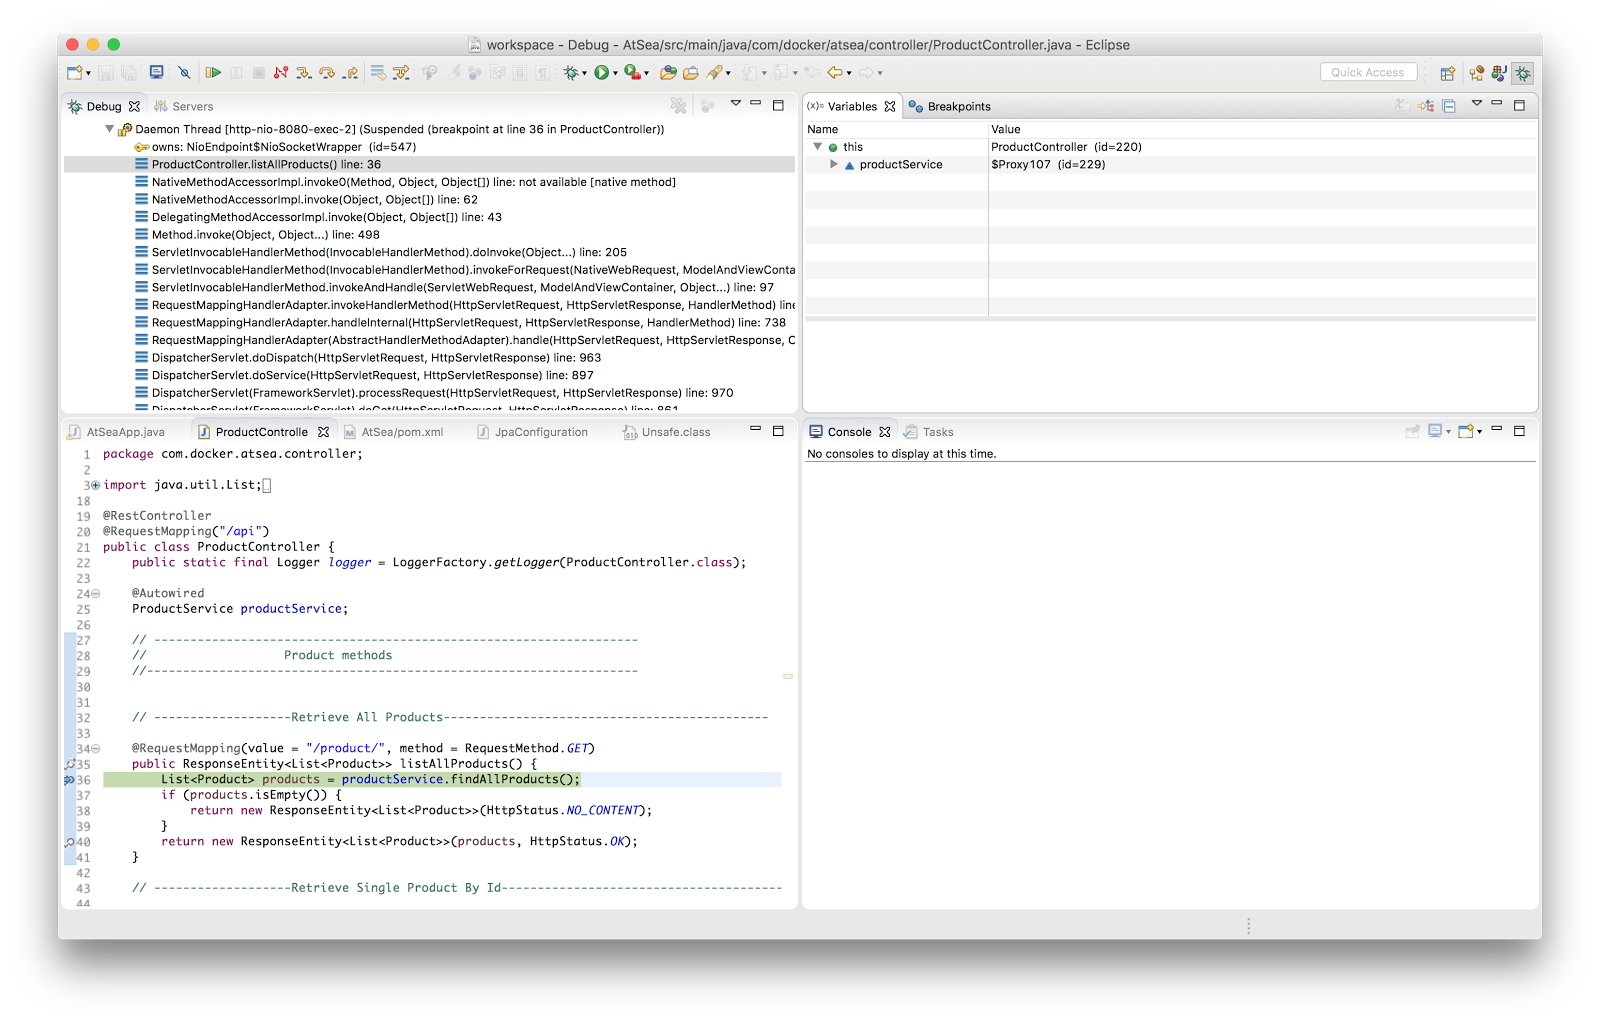
To test remote debugging set a breakpoint on ProductController.java where it returns a list of products.

You can test it using curl or your preferred tool for making HTTP requests:
curl -H "Content-Type: application/json" -X GET http://localhost:8080/api/product/
Eclipse will switch to the debug perspective where you can step through the code.

The AtSea Shop example shows how easy it is to use containers as part of your normal development environment using tools that you and your team are familiar with. Download the application to try out developing with containers or use it as basis for your own Spring Boot REST application.
Interested in more? Check out these developer resources and videos from Dockercon 2017.


